polski
 español

 Jakub Krawczak
Below we show where to find the module, how to add a broadcast and its episodes, how saving an episode differs from publishing it, and how to display broadcasts on your website using templates and widgets.
Where can I find the Broadcasts module?
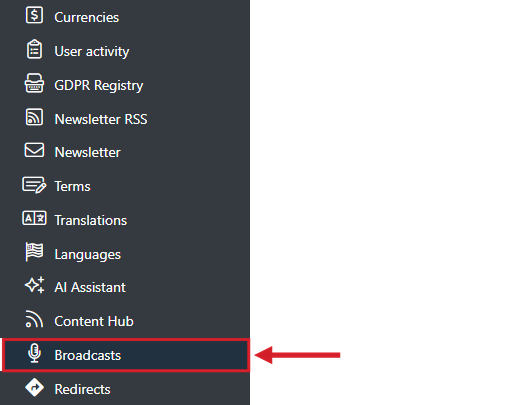
In the menu on the left side of the panel, click [Broadcasts]. A list of all broadcasts added to the website will be displayed.
Broadcast list
The broadcast list shows the cover, title, last update date, number of episodes and status of each broadcast. From here you can add a new broadcast and go to its episodes.
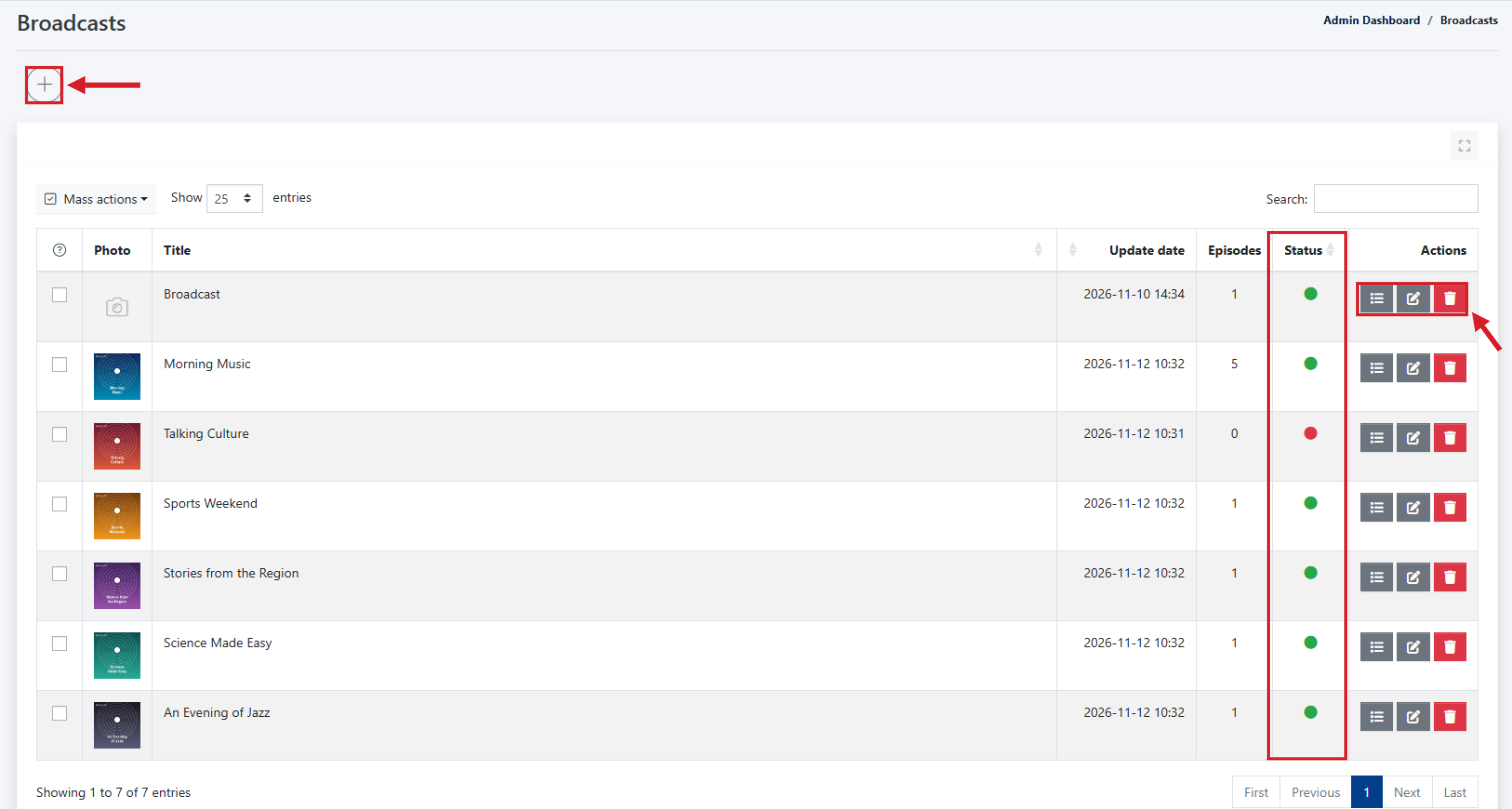
- The [+] button opens the form for adding a new broadcast.
- The [Search] field filters the list by the phrase you enter.
- The [Status] column shows whether a broadcast is active (green dot) or inactive, i.e. archived (red dot).
- The button with the list icon takes you to the episodes of the broadcast.
- The button with the pencil icon opens the broadcast for editing.
- The red button with the bin icon deletes the broadcast.
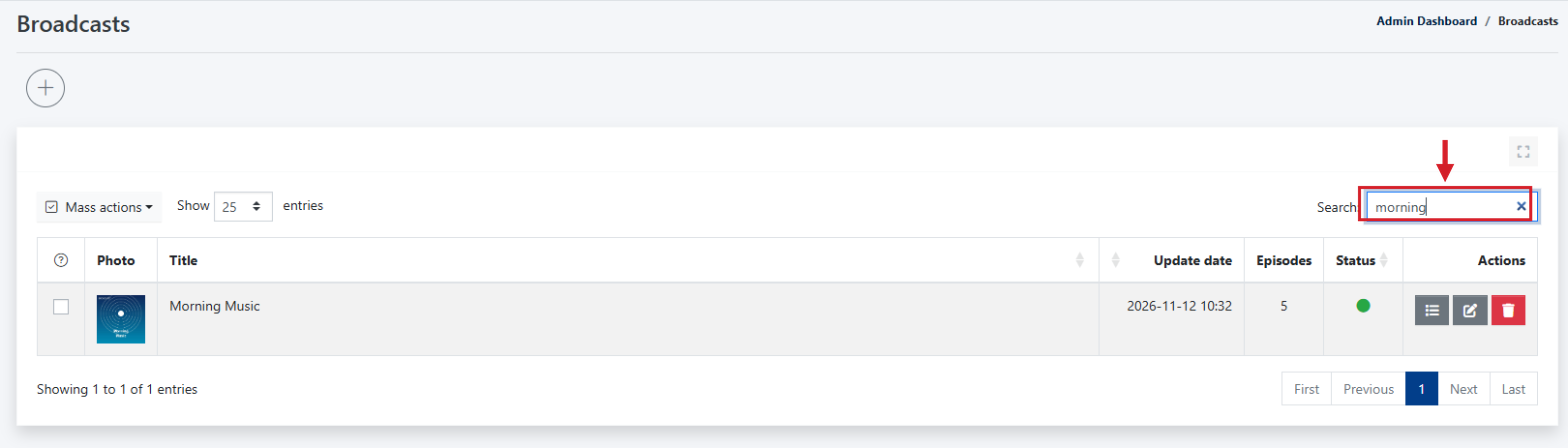
To quickly find a broadcast, type part of its title in the [Search] field. The list narrows down automatically, without confirming.
How do I add a new broadcast?
On the broadcast list, click the [+] button. The [Adding a new broadcast] form will open.
Title and descriptions
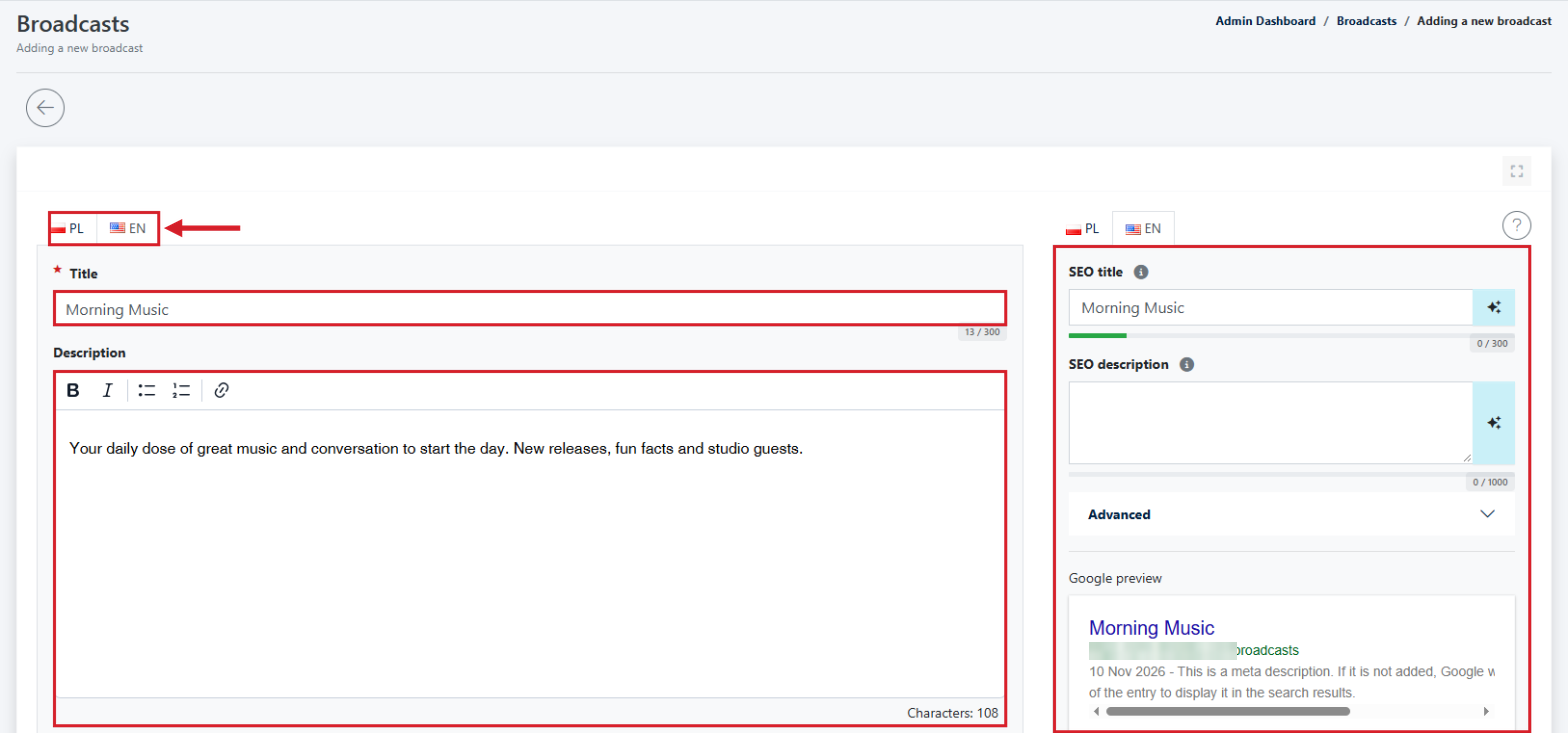
- The [PL] and [EN] tabs let you fill in the content for each language version of the website.
- Title – the name of the broadcast. This is the only required field (marked with a red asterisk). The limit is 300 characters.
- Description – a short description of the broadcast displayed in the header of the broadcast page, next to the cover.
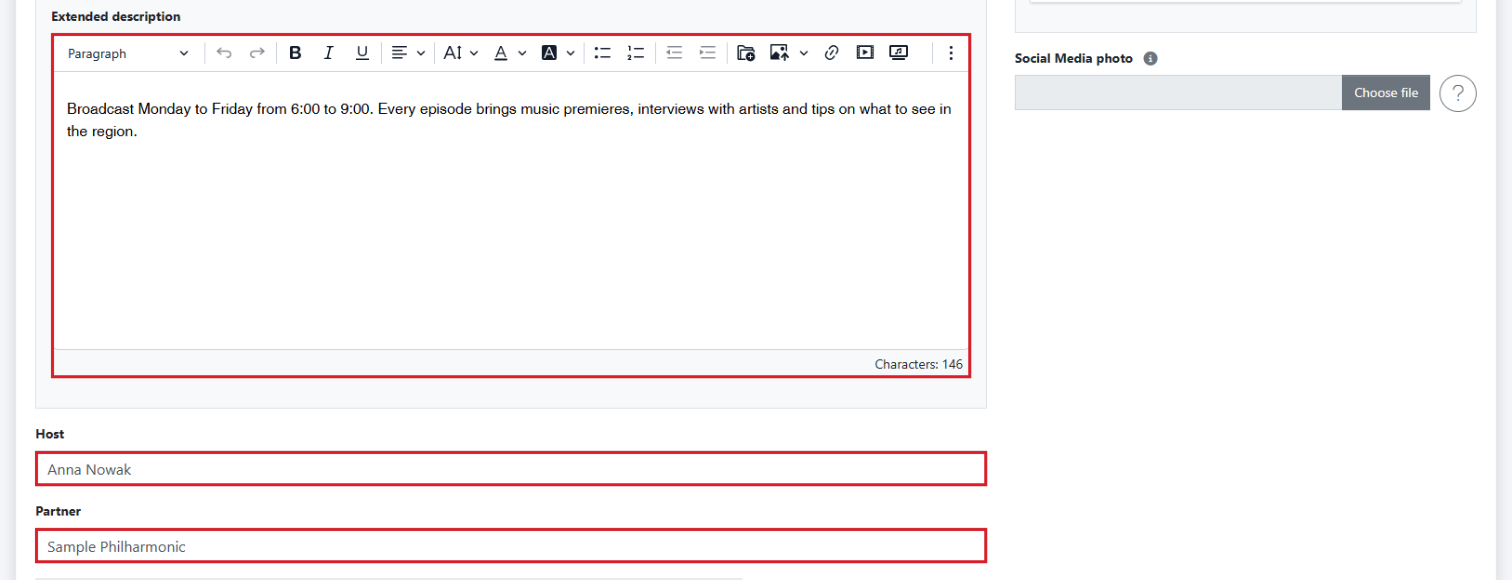
- Extended description – a longer text with a full editor (formatting, links, multimedia). On the broadcast page it appears below the header.
- Host – the name of the person who hosts the broadcast. It is displayed on the broadcast page and next to its episodes.
- Partner – the name of the broadcast partner. It appears in the header of the broadcast page.
- SEO title and SEO description – optional changes to the page title and meta description visible in Google search results. If you leave them empty, the system uses the broadcast title. You can see the result straight away in the [Google preview] field.
Cover and social media photo
The cover is a square photo that represents the broadcast on the list, on the broadcast page and in widgets. Hover over the information icon next to the [Cover] field to check the file requirements.
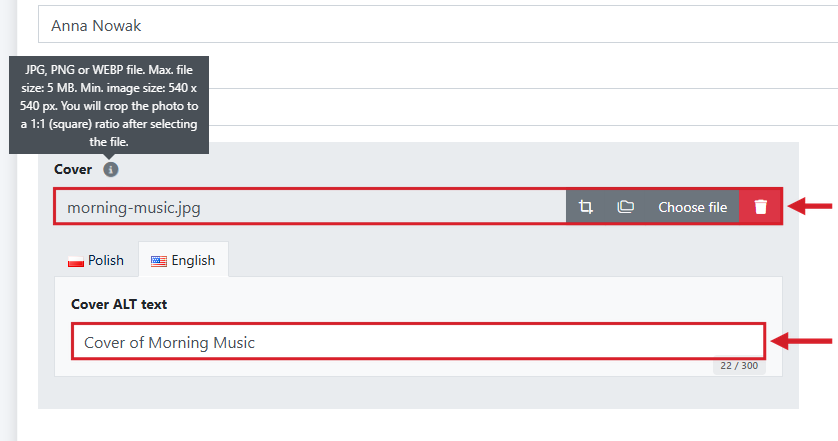
- Accepted formats: JPG, PNG, WEBP.
- Maximum file size: 5 MB.
- Minimum image size: 540 x 540 pixels. You will crop the photo to a 1:1 (square) ratio after selecting the file.
- Social Media photo – the image displayed when a link to the broadcast is shared, e.g. on Facebook. The recommended size is 1200 x 630 pixels (max. 10 MB).
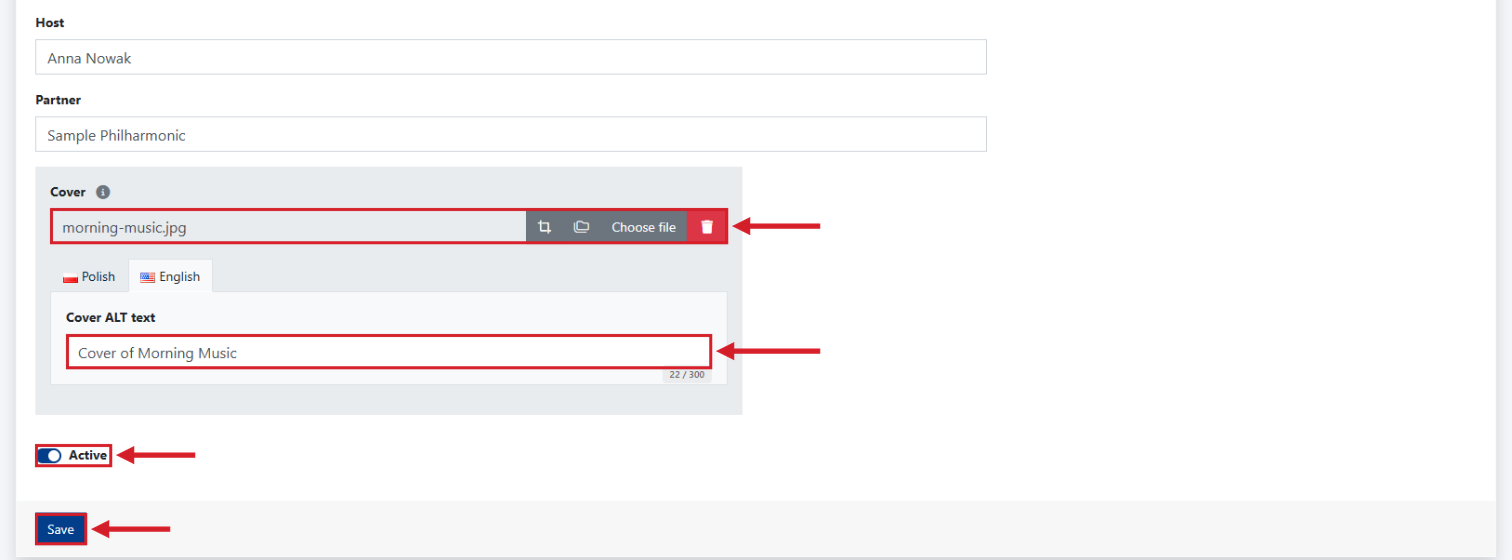
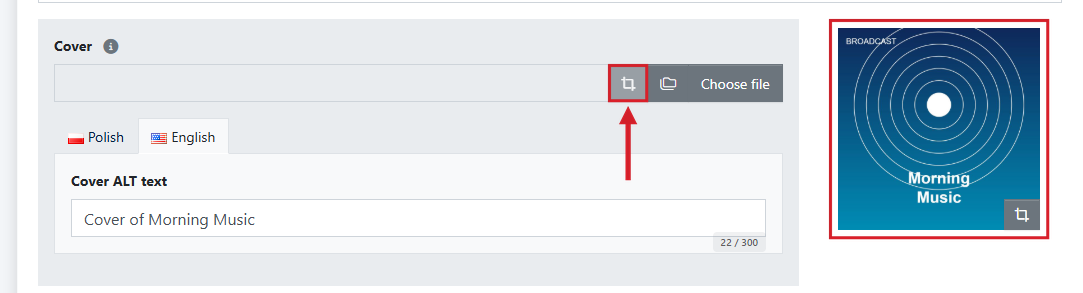
- Cover – click [Choose file] and select a photo from your disk. The cropping icon lets you adjust the framing, and the red bin icon removes the selected file.
- Cover ALT text – a short description of the image for screen readers and search engines.
- Active – determines whether the broadcast is available to readers. You will find more about this toggle below.
- Click the navy blue [Save] button.
After saving, the message “Changes have been successfully saved.” appears at the top of the screen, and a direct link to the broadcast page on your website is displayed above the form.

The uploaded cover appears next to the [Cover] field. You can adjust the framing at any time with the cropping icon shown in the preview or next to the file name.
Active and archived broadcasts
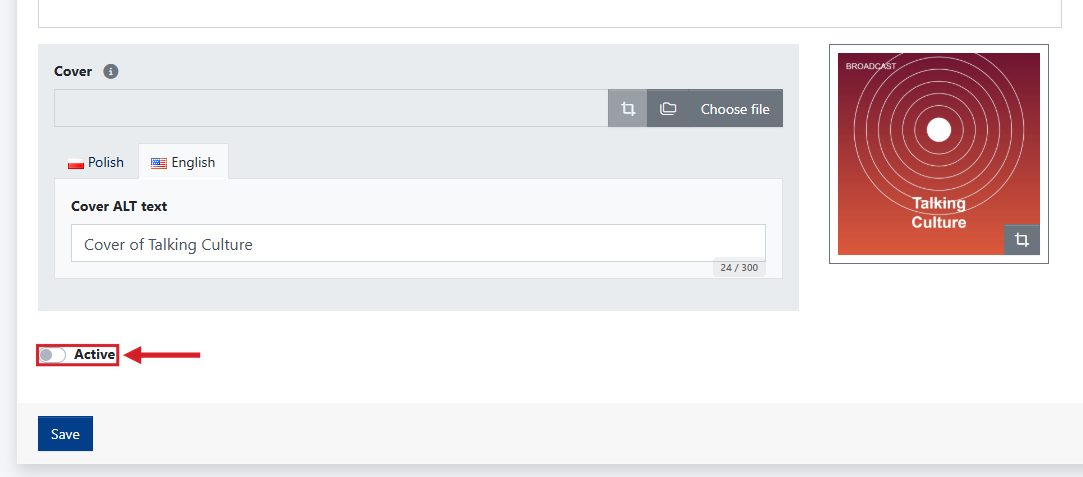
The [Active] toggle in the broadcast form decides whether the broadcast is visible on the website. By default, every new broadcast is active.
- Active broadcast (toggle on, green dot on the list) – the broadcast is publicly available on the website, in the broadcast list and in widgets.
- Inactive, i.e. archived broadcast (toggle off, red dot on the list) – the broadcast and its episodes remain in the panel but are not shown to readers. This is a good solution for broadcasts that have ended but whose recordings you want to keep.
You can change the status of several broadcasts at once with the [Mass actions] button above the list: select the broadcasts and choose [Change the status to active] or [Change the status to inactive].
How do I add a broadcast episode?
You always add episodes within a specific broadcast. You can go to the episode list in two ways:
- on the broadcast list, click the button with the list icon in the [Actions] column,
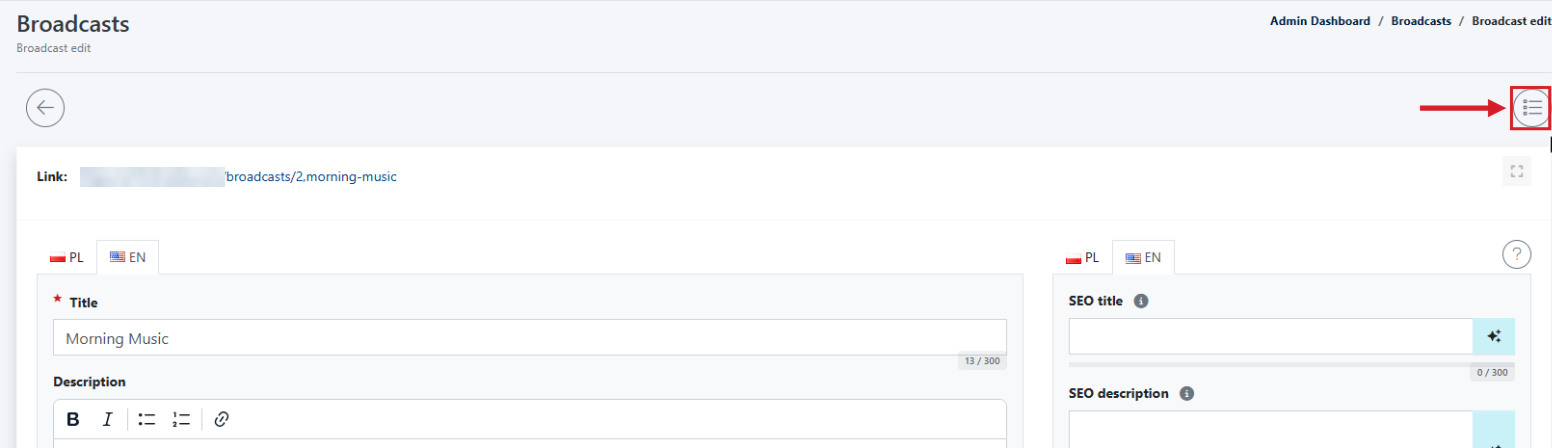
- when editing a broadcast, click the round [Episodes] button in the top right corner.
Step 1: upload the audio file
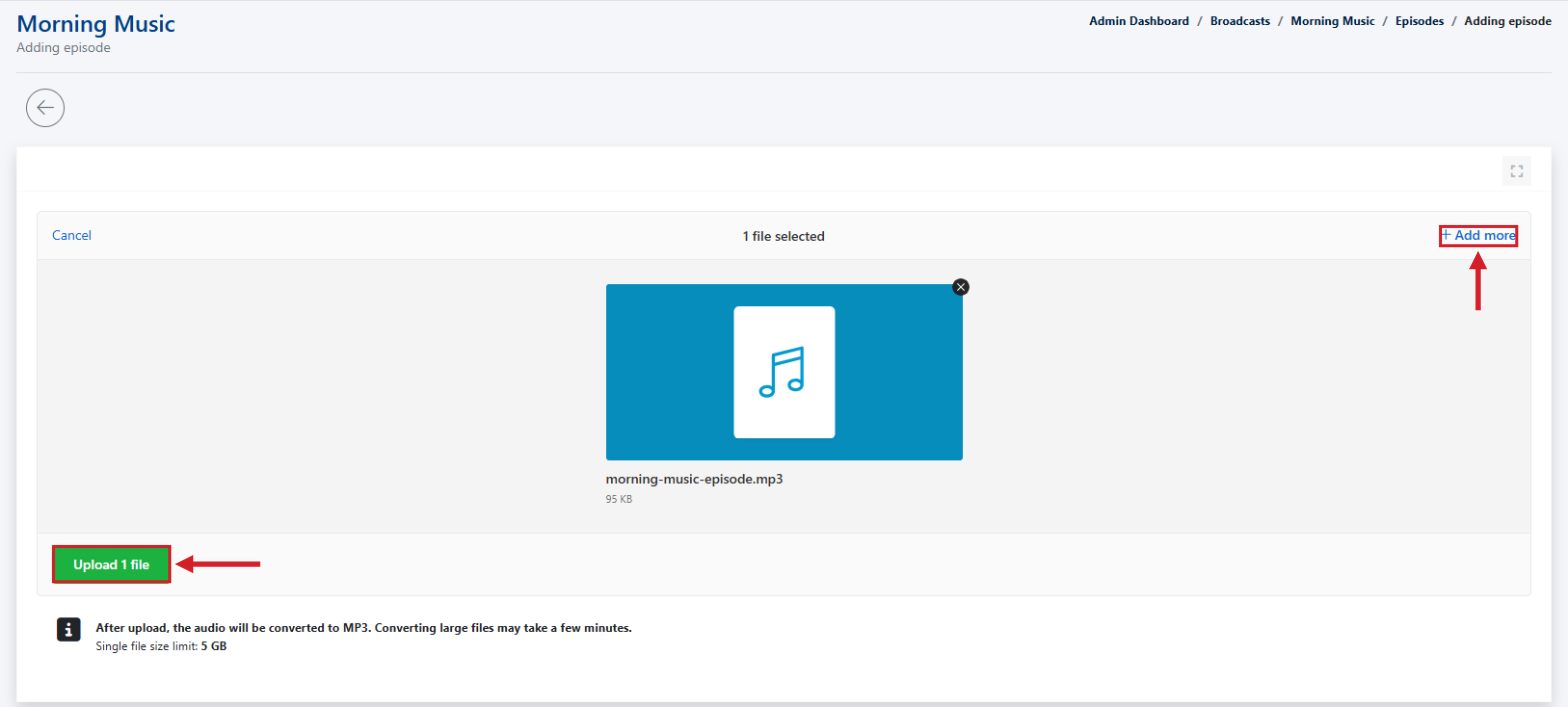
On the episode list, click the [+] button. The first step is to add an audio file. Drag the file into the marked area or click [browse files] and select it from your disk.
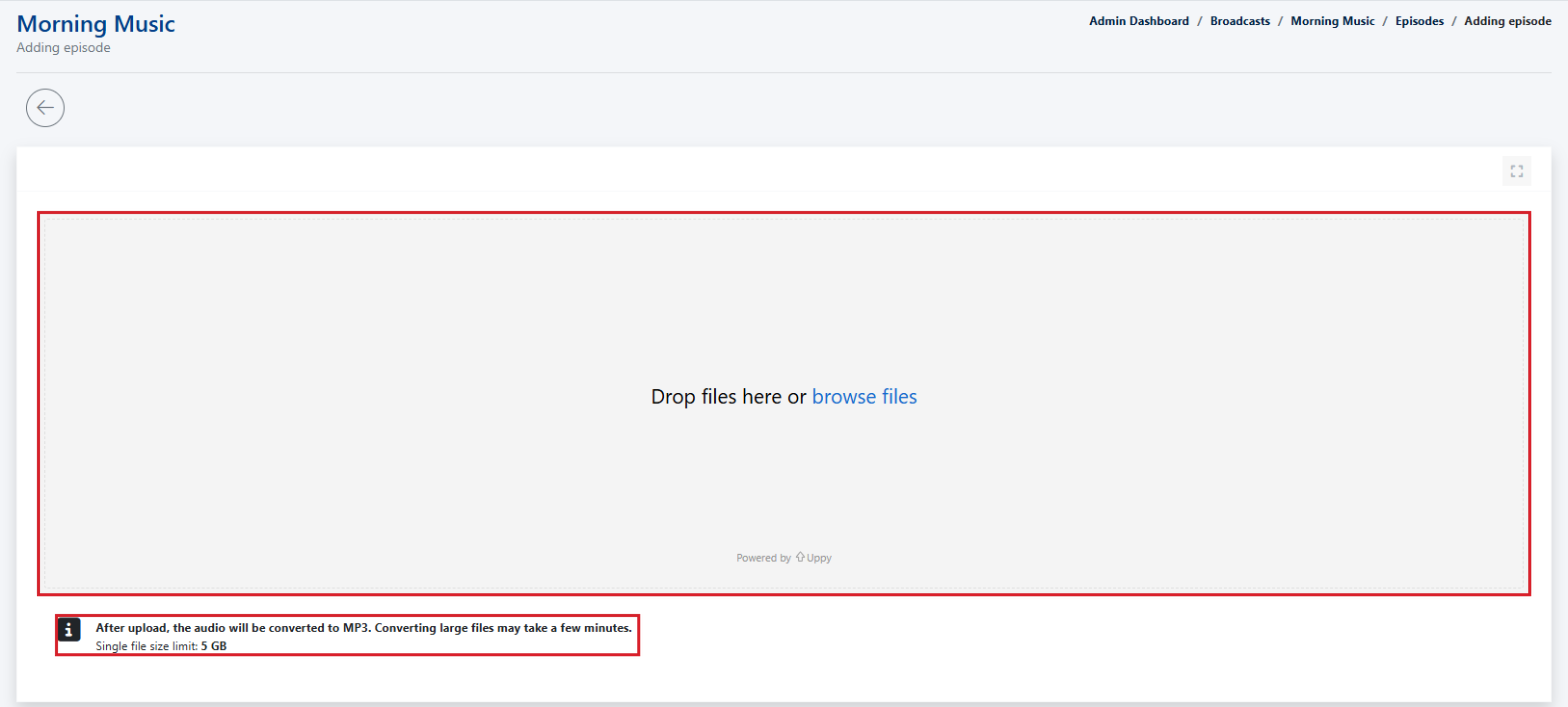
After upload, the file is automatically converted to MP3. The single file size limit is 5 GB.
When the file appears on the list, click the green [Upload 1 file] button. If you want to change your selection, use [Cancel] or add another file with the [+ Add more] button.
After the file is uploaded, a yellow conversion message appears. The episode form unlocks automatically once processing is complete. The episode title is set based on the file name; you can change it later.
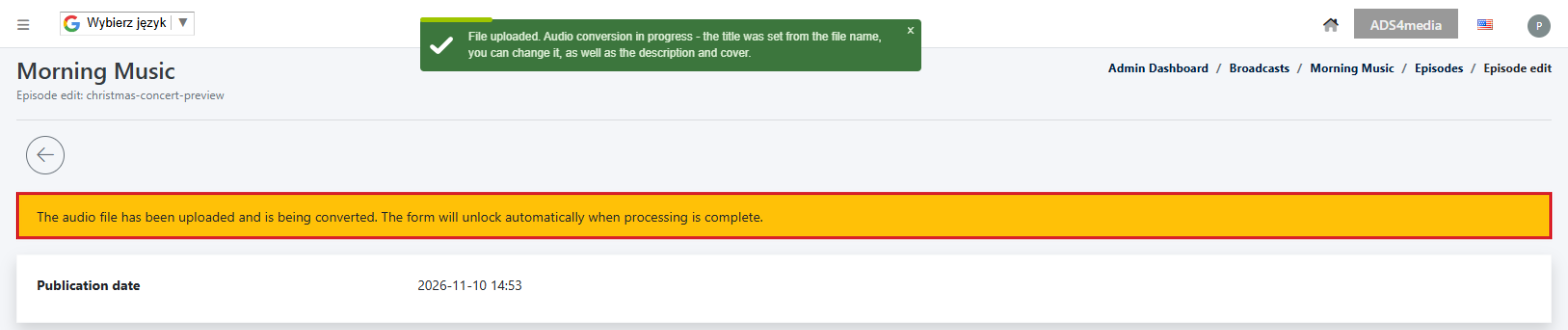
IMPORTANT: Converting large files may take a few minutes. Do not close the tab until the episode form unlocks.
Step 2: fill in the episode details
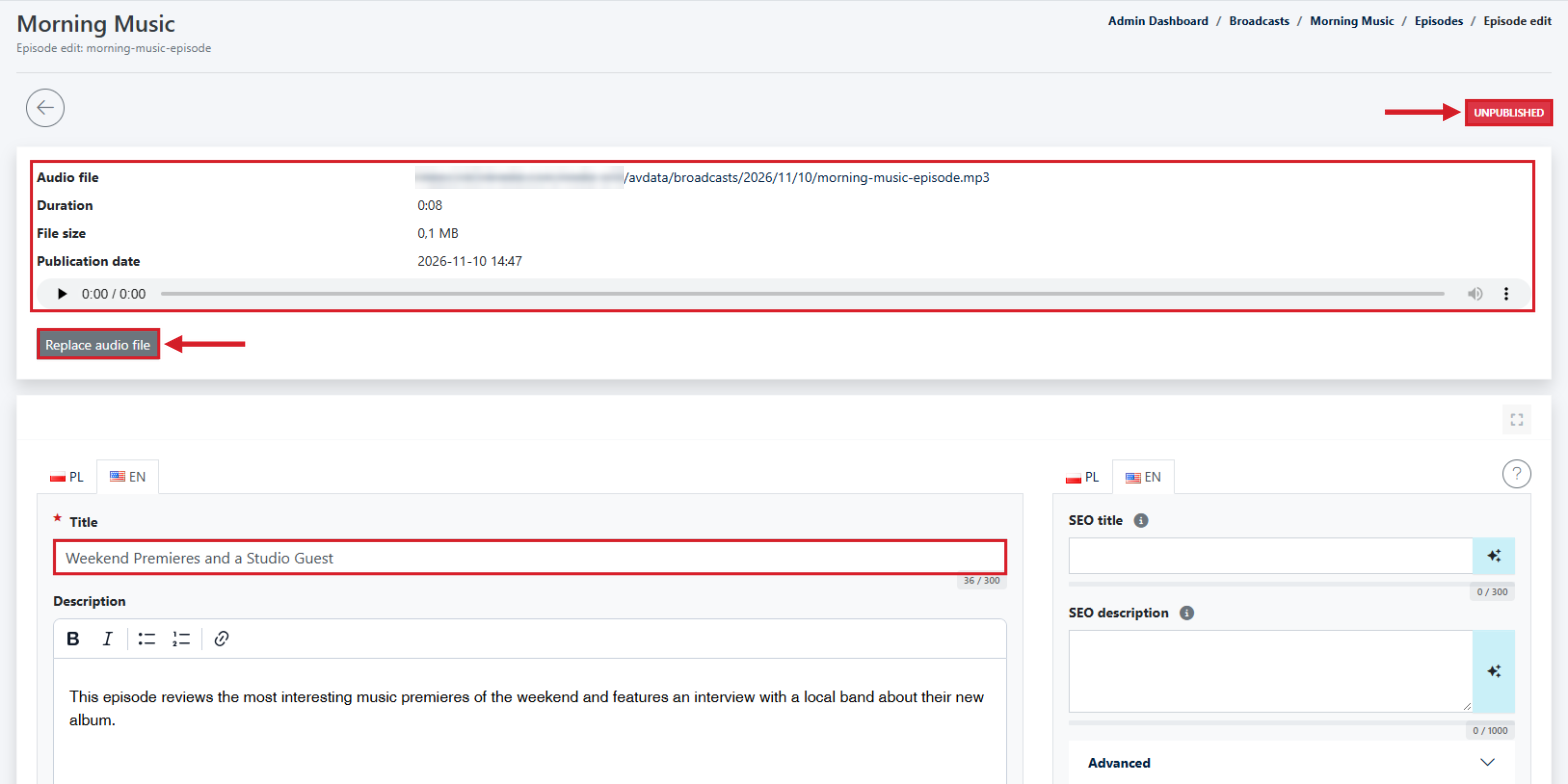
- At the top of the form you can see the audio file address, duration, file size and publication date, as well as a player for listening to the recording.
- The [Replace audio file] button lets you upload a new version of the recording without creating a new episode.
- The red [UNPUBLISHED] label means the episode has not been published yet.
- Enter the episode title in place of the file name. Below it, fill in the episode Description.
In the [Tags] field, type a keyword and confirm it with Enter or a comma. To remove a tag, click the “x” next to its name.
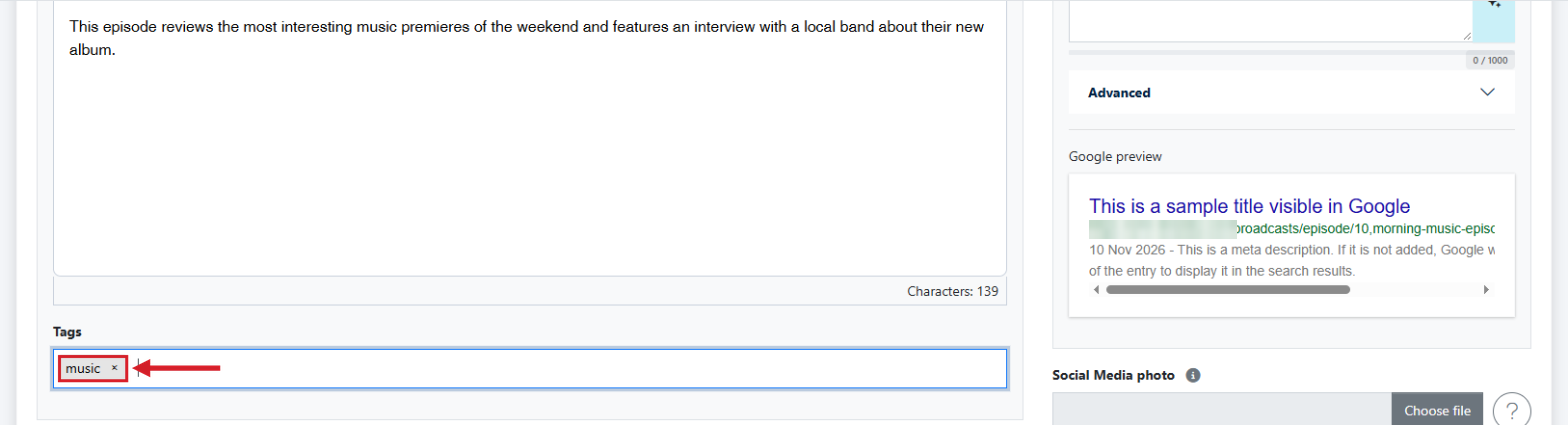
Further down you will find the SEO fields and [Social Media photo], which work the same way as in the broadcast form.
Step 3: cover, date, gallery and publication
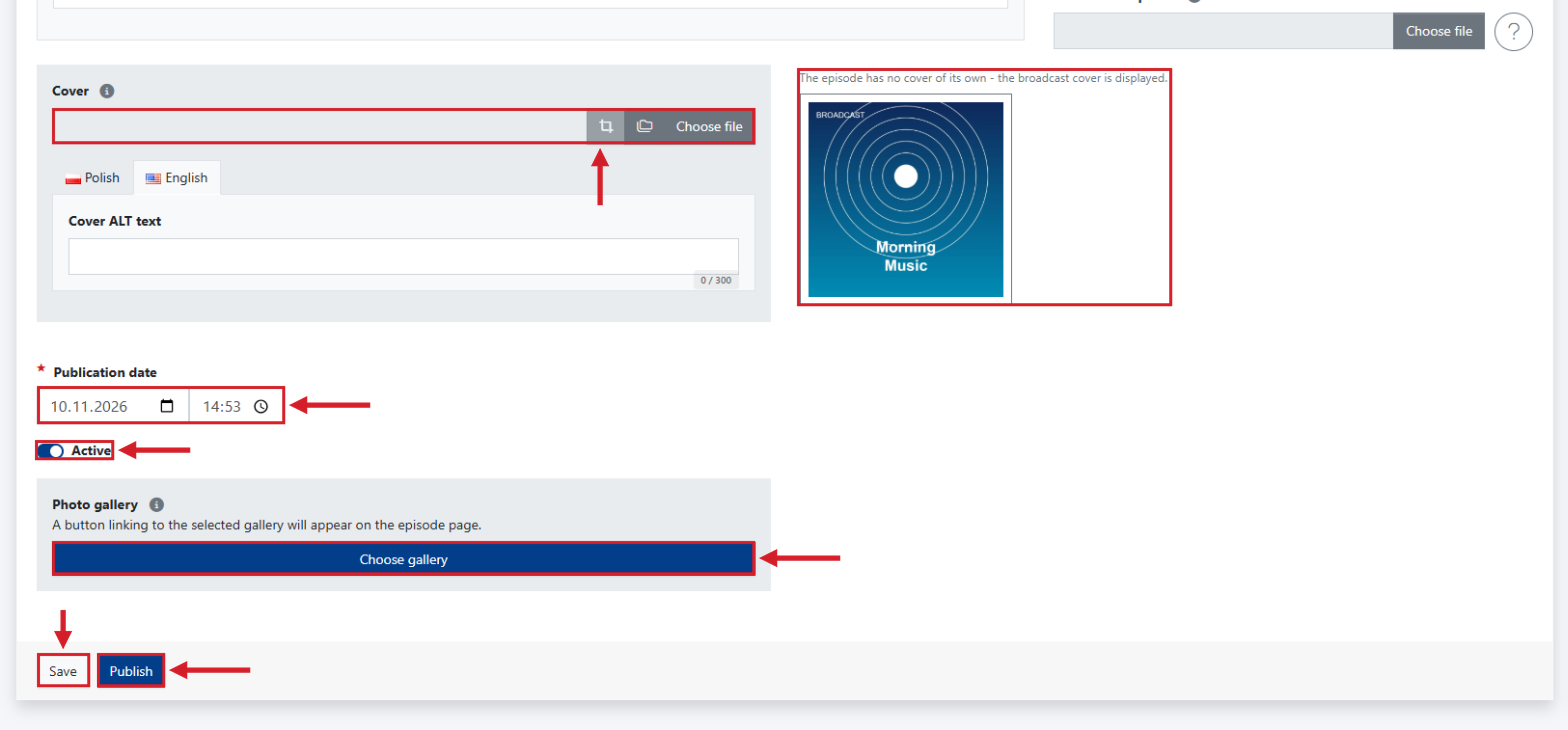
- Cover – an episode can have its own cover (same requirements as the broadcast cover).
- If the episode has no cover of its own, the broadcast cover is displayed. The caption above the preview informs you about this.
- Publication date – a required field, set by default to the moment the file was uploaded.
- Active – the episode visibility toggle.
- Photo gallery – the [Choose gallery] button lets you link a photo gallery to the episode. A button leading to the gallery will then appear on the episode page.
- [Save] – saves your changes but does not publish the episode.
- [Publish] – saves your changes and publishes the episode on the website.
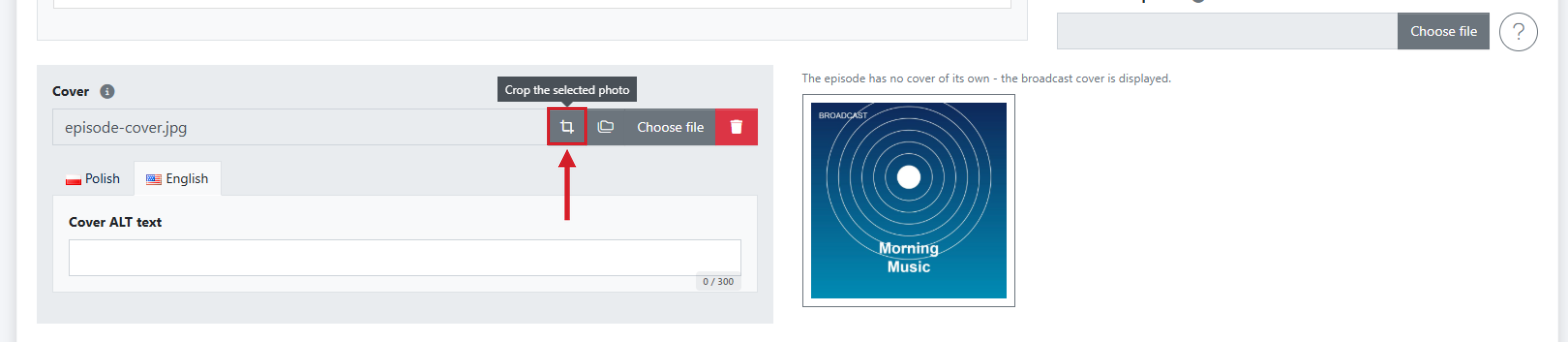
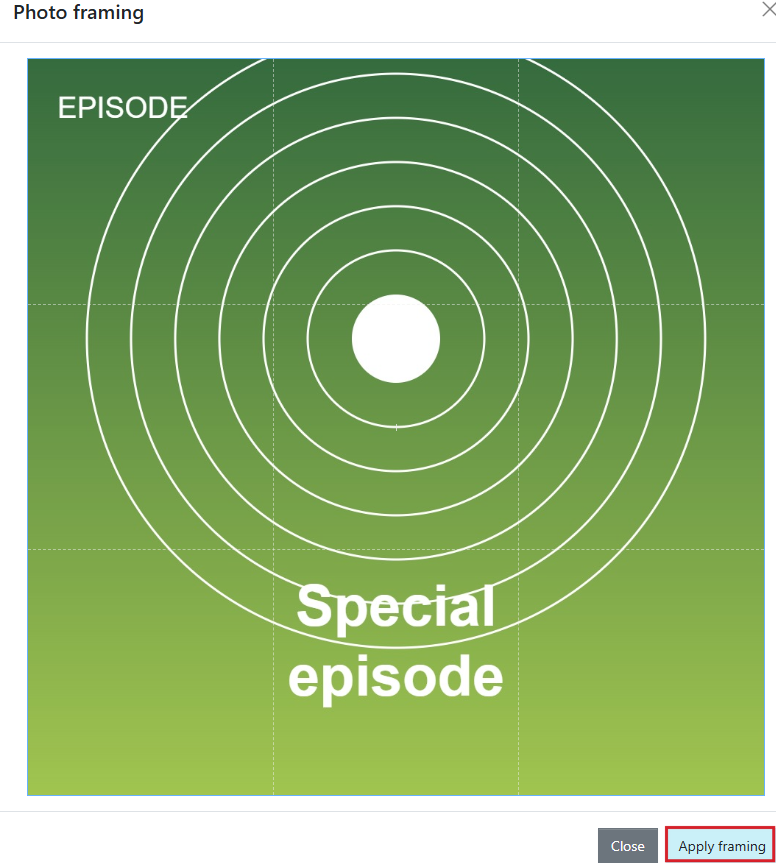
After choosing your own cover, click the cropping icon next to the file name to adjust the framing. Set the square area of the photo and click [Apply framing].
Linking a photo gallery to an episode
After clicking [Choose gallery], a window with a list of galleries opens. Select a gallery with the radio button on the left. The [Photos] column shows how many photos each gallery contains.
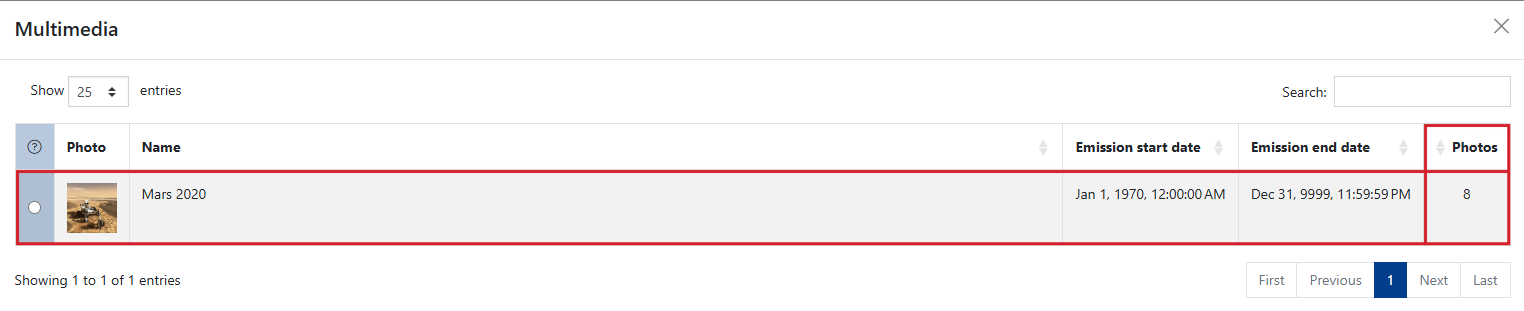
IMPORTANT: Only a gallery containing at least 5 photos can be linked to an episode.
The selected gallery appears in the episode form. The [Editing] button takes you to the gallery editor, and the [Delete] button unlinks it from the episode.
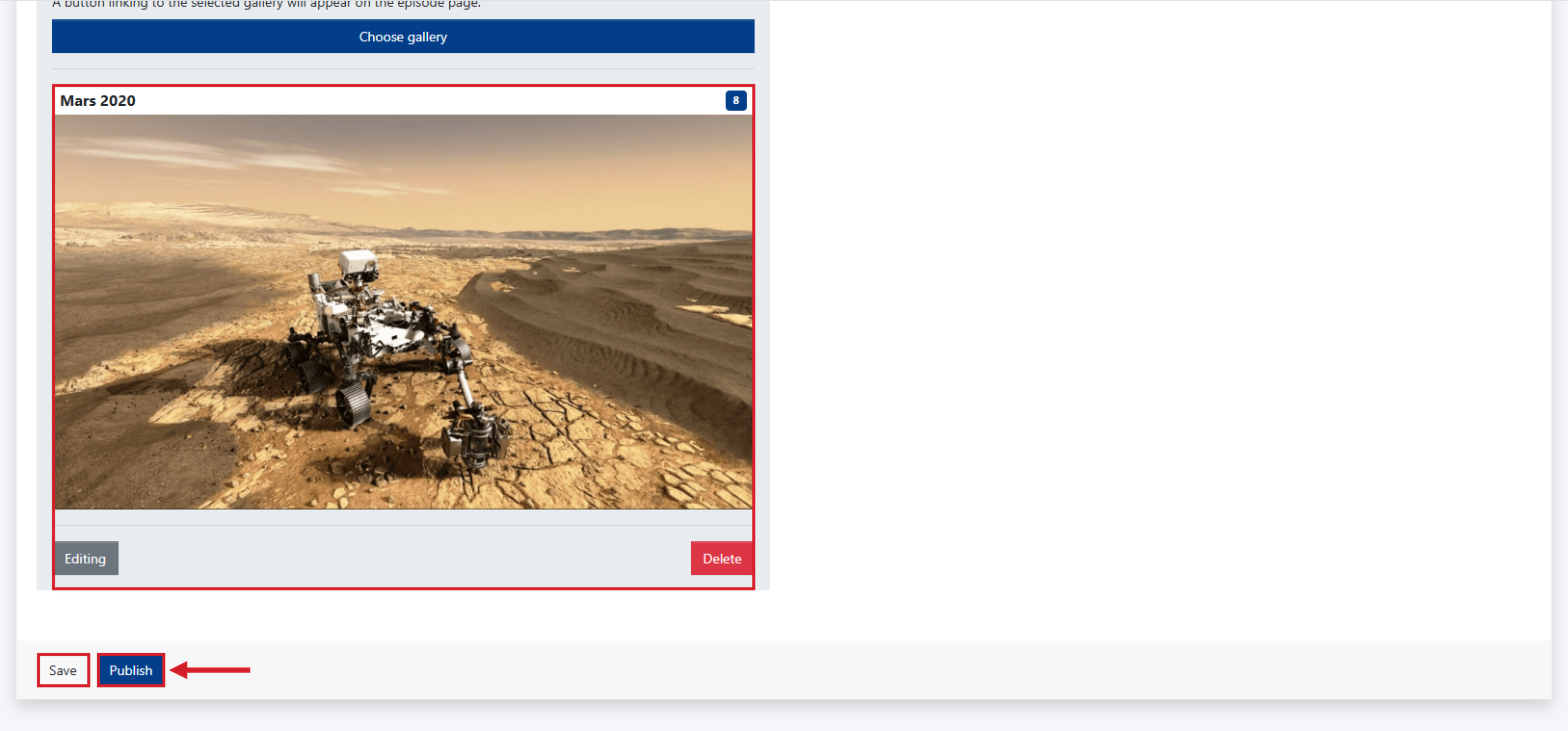
Save or Publish?
- Click [Save] if the episode is not ready yet. It will be saved as unpublished and will not be visible on the website.
- Click [Publish] when the episode should appear on the website on the selected date and time. You will see the message “The episode has been published.” at the top of the screen, and the red [UNPUBLISHED] label will disappear.

Episode list
The episode list of a broadcast shows the cover, title, publication date, as well as the publication state and status of each episode. The play button next to the title lets you listen to the recording without opening the editor.
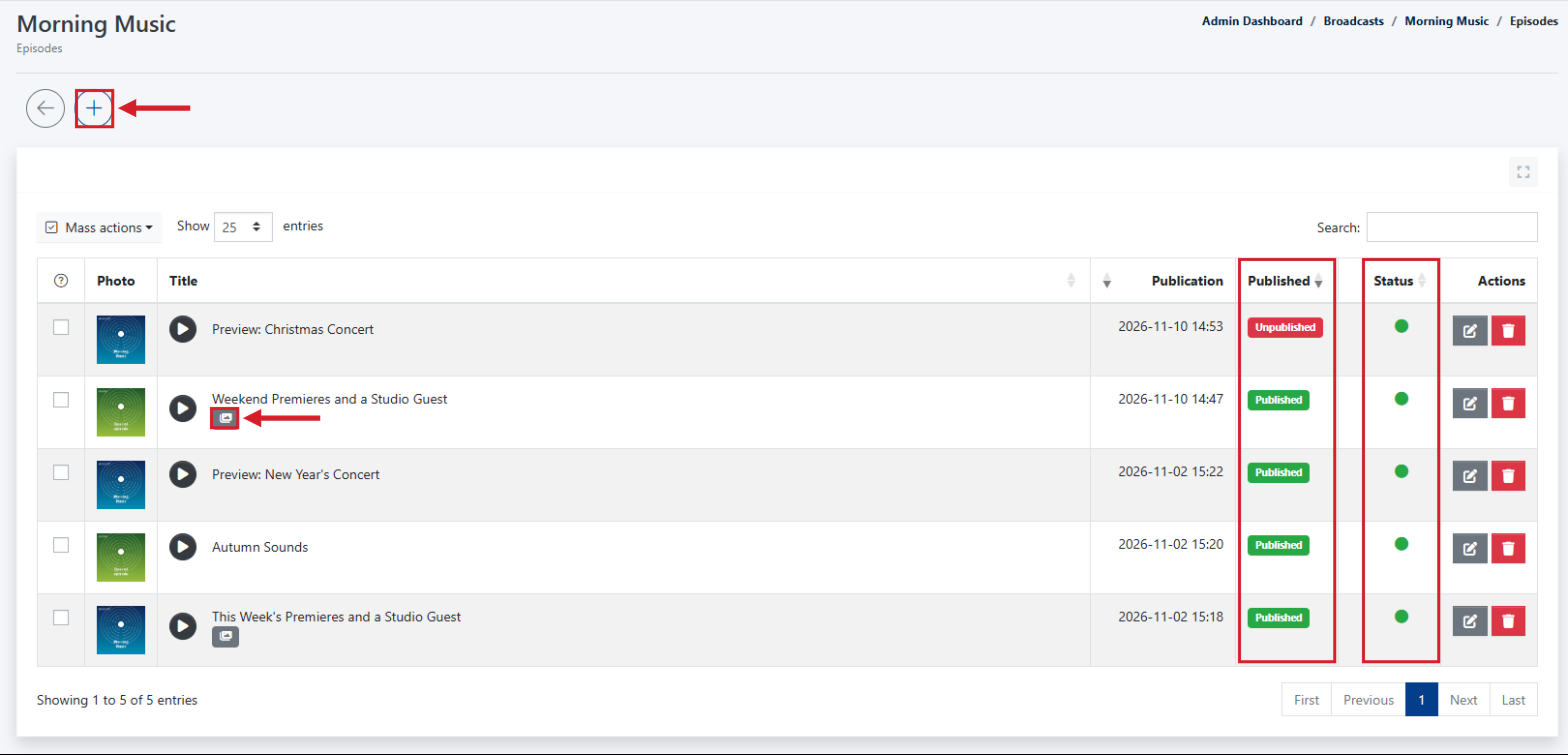
- The [+] button adds a new episode to this broadcast.
- The [Published] column shows the [Published] label (green) or [Unpublished] label (red).
- The [Status] column shows whether the episode is active.
- The gallery icon below the title means a photo gallery is linked to the episode.
- Buttons for editing and deleting the episode.
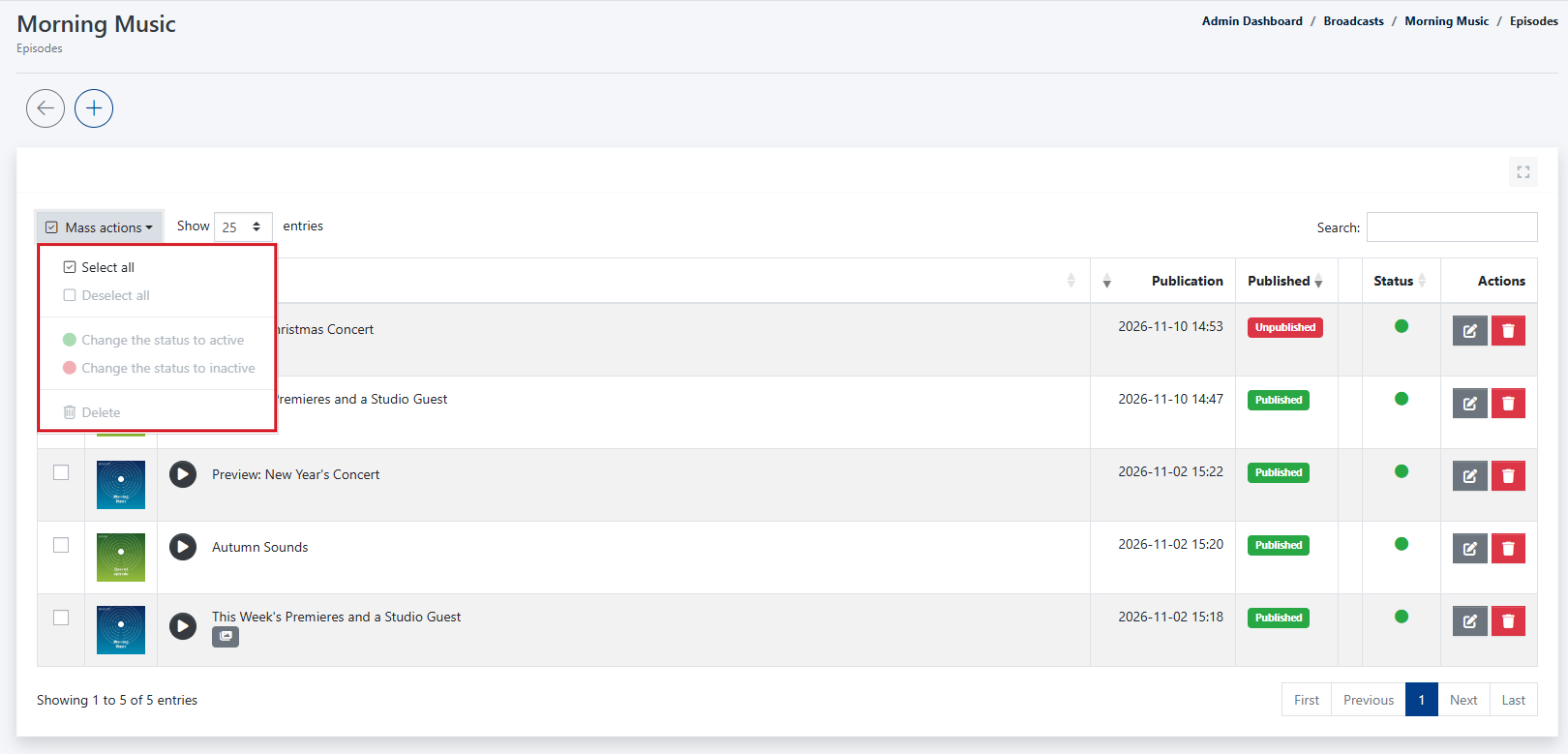
The [Mass actions] button lets you select several episodes at once, change their status to active or inactive, or delete them.
What do broadcasts look like on the website?
The broadcast list is available at your website address followed by /broadcasts (e.g. yourwebsite.com/broadcasts). Each broadcast shows its cover, the title of the latest episode, the date, the host and the length of the recording, and the play button starts the latest episode.
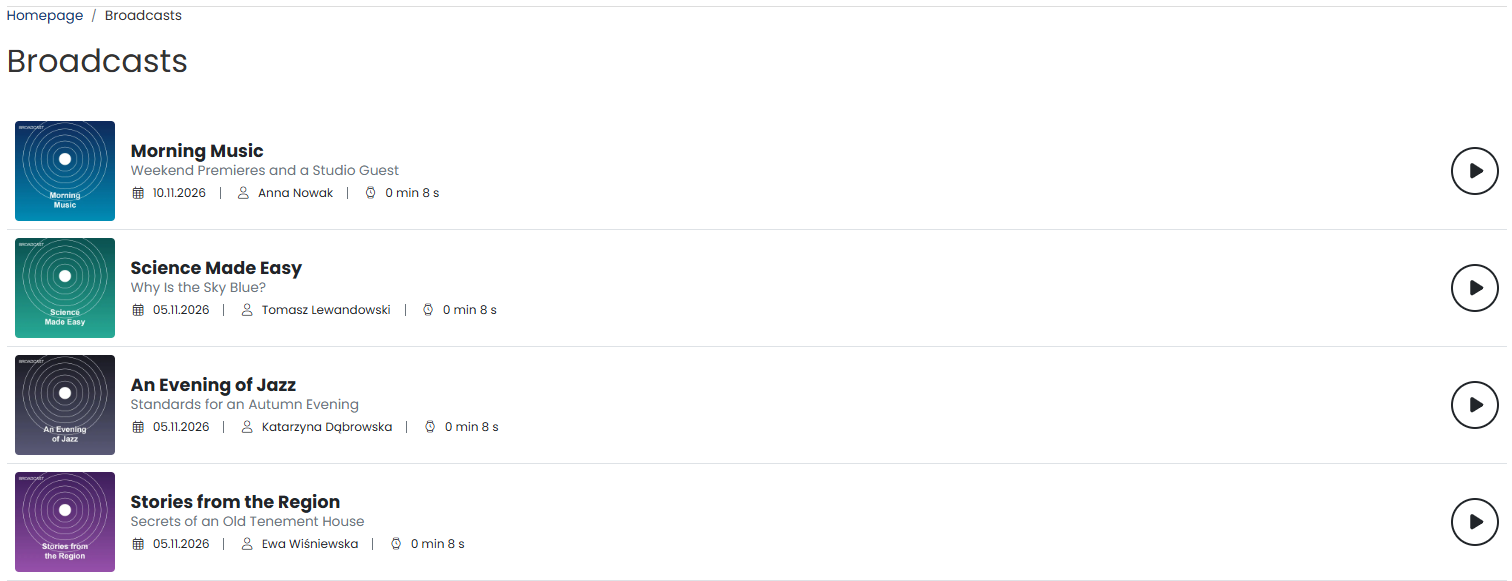
The list includes active broadcasts that have at least one published episode.
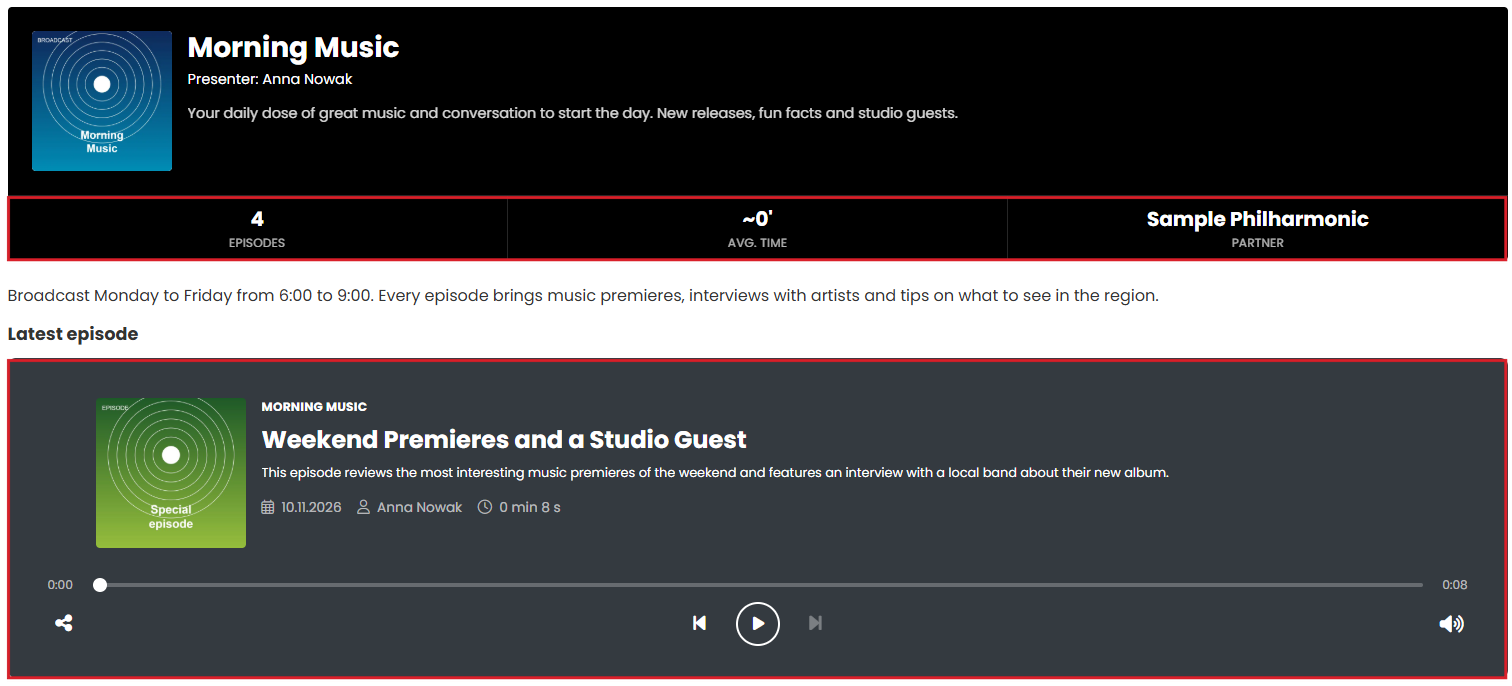
The broadcast page presents the cover, title, host and description, followed by the number of episodes, the average episode length and the broadcast partner. Below them you will see the extended description and a player with the latest episode.
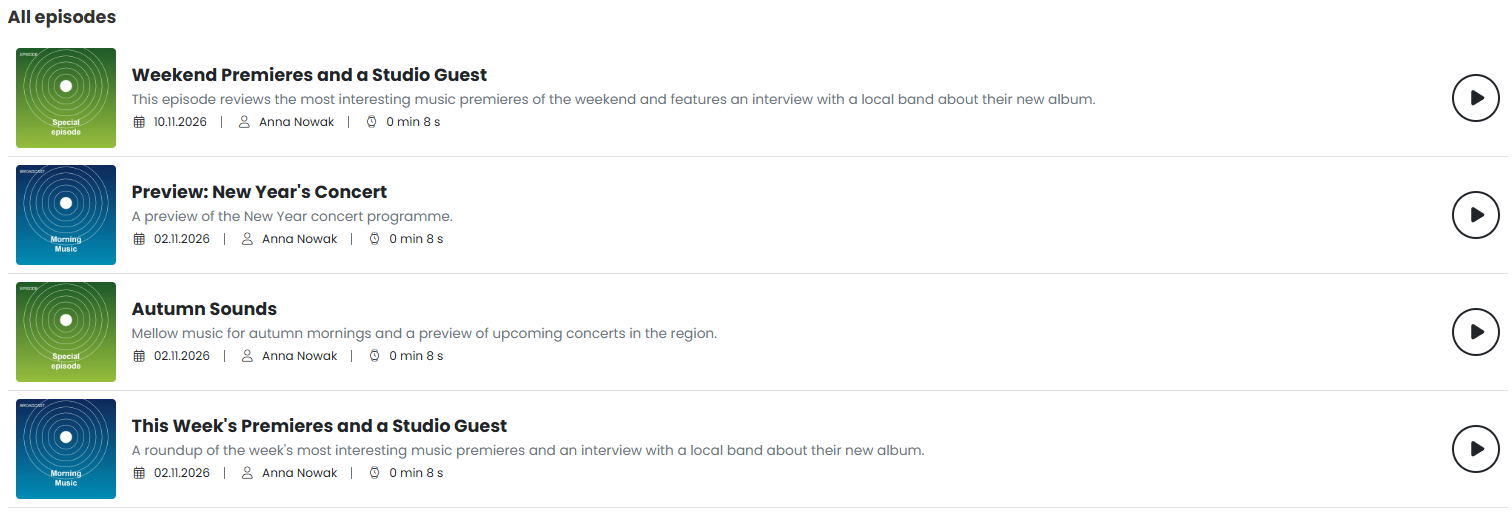
Below the player there is the [All episodes] section with a list of published episodes. Episodes that have been saved but not published are not visible here.
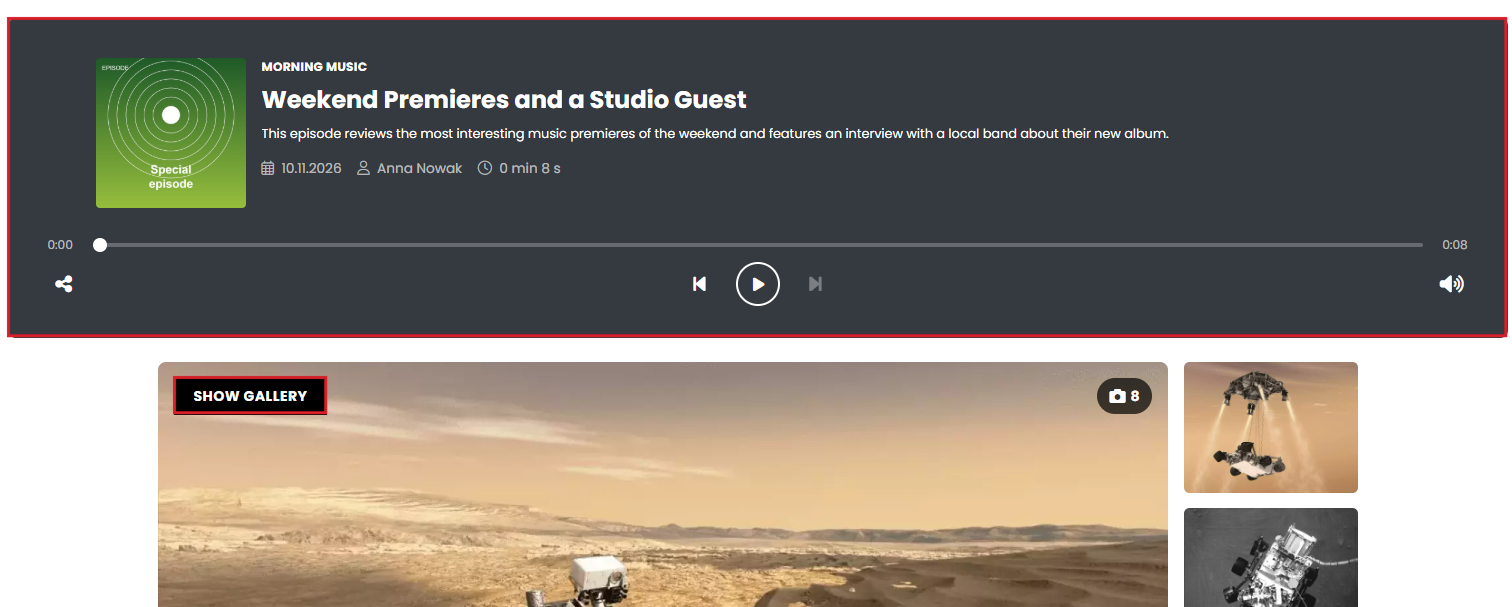
Clicking an episode title opens its page with a player. If a gallery is linked to the episode, its preview with a [Show gallery] button appears below the player.
Broadcast templates in the Page builder module
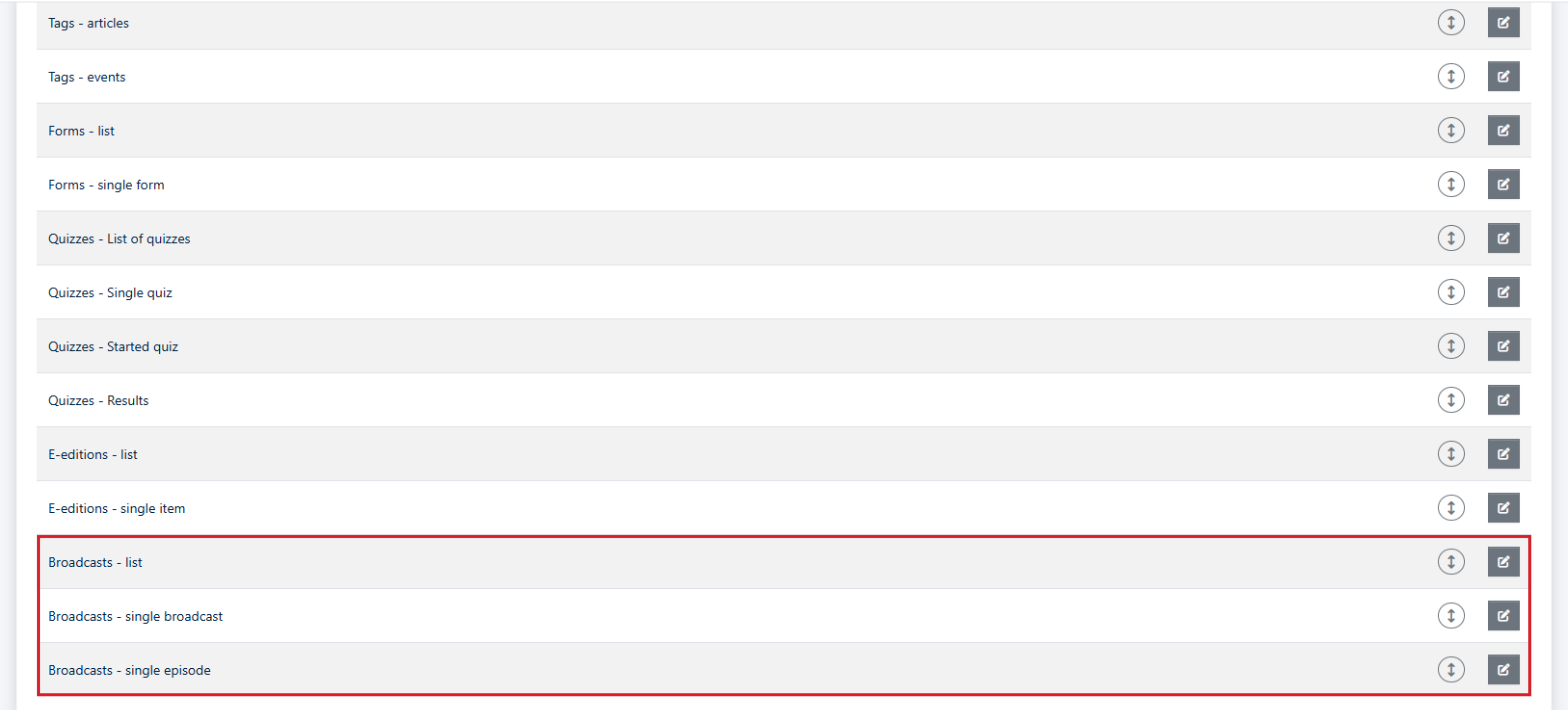
You can change the look of the broadcast subpages in the [Page builder] module, on the [Templates] tab. The Broadcasts module uses three templates:
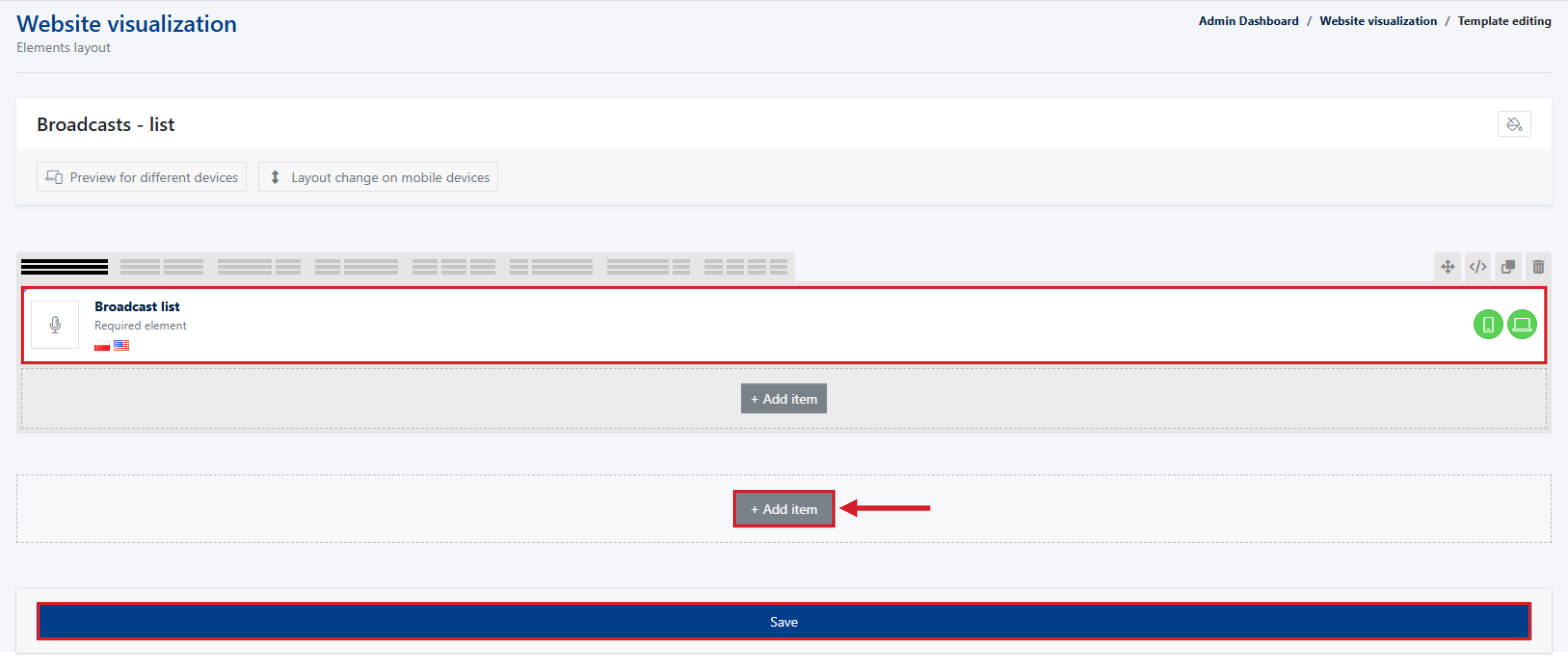
- Broadcasts - list – the page with a list of all broadcasts,
- Broadcasts - single broadcast – the page of a single broadcast,
- Broadcasts - single episode – the page of a single episode.
Click the template name or the edit button to open it. Each template contains a required element (e.g. [Broadcast list]) that displays the module content and cannot be removed. Around it you can add further elements, e.g. ads or widgets, with the [+ Add item] button. Confirm your changes with the [Save] button.