
What the Homepage Planner offers:
- Rearranging the order of articles displayed in the widget (regardless of their publication date).
- Pinning specific articles in the widget for a selected period of time.
- Excluding specific articles from being displayed in a given widget.
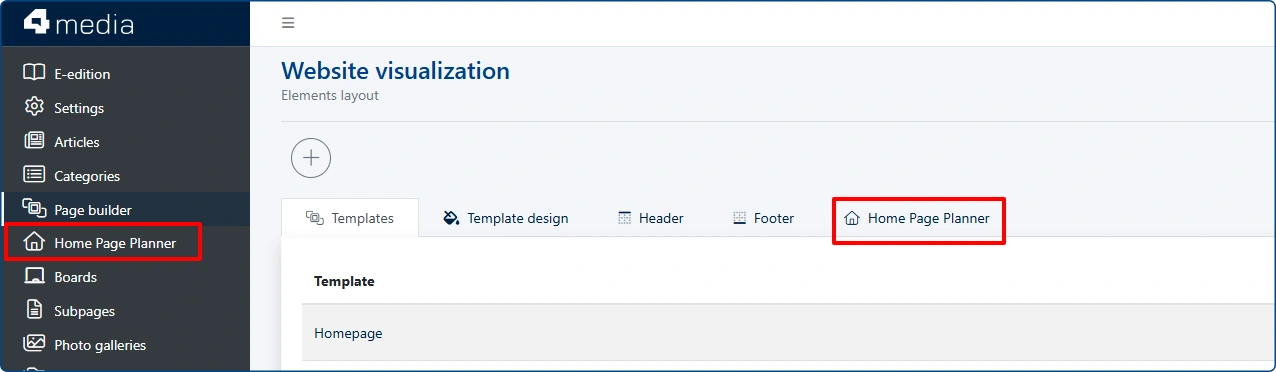
This set of features is available in the Page Builder module in the CMS 4media administration panel or as another module in the dark grey menu on the left side.
Basic Planner settings
In the upper-right corner there is a circular button which, when clicked, takes you to support/help materials (this one specifically).
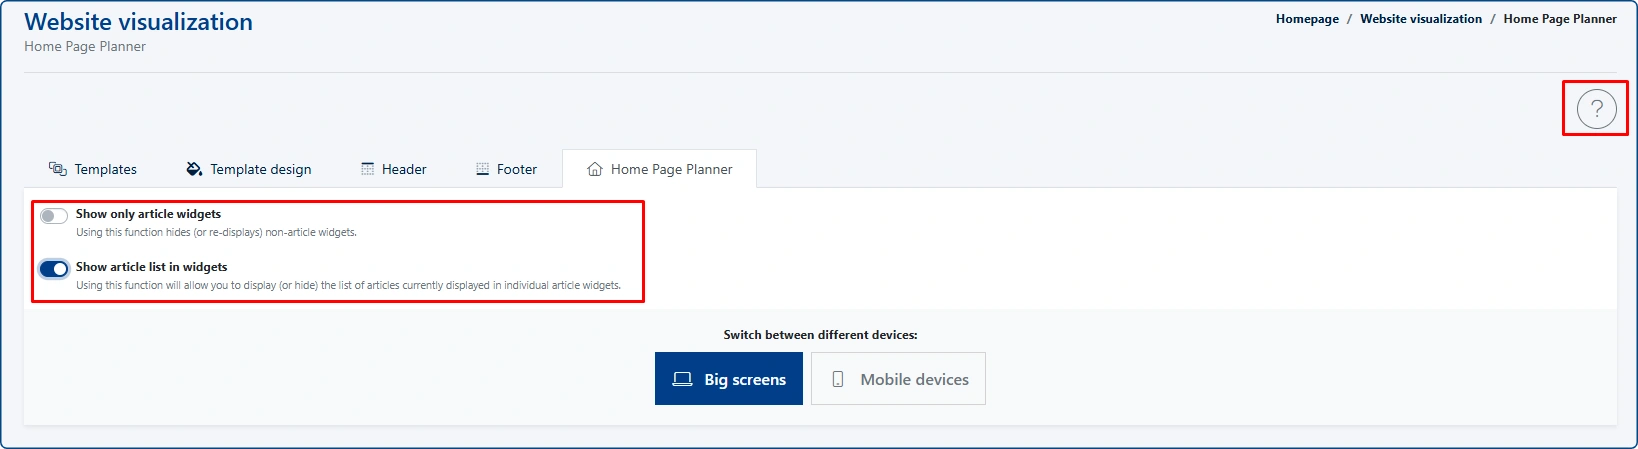
In the central part of the module, there are two key settings that affect how the planner is displayed:
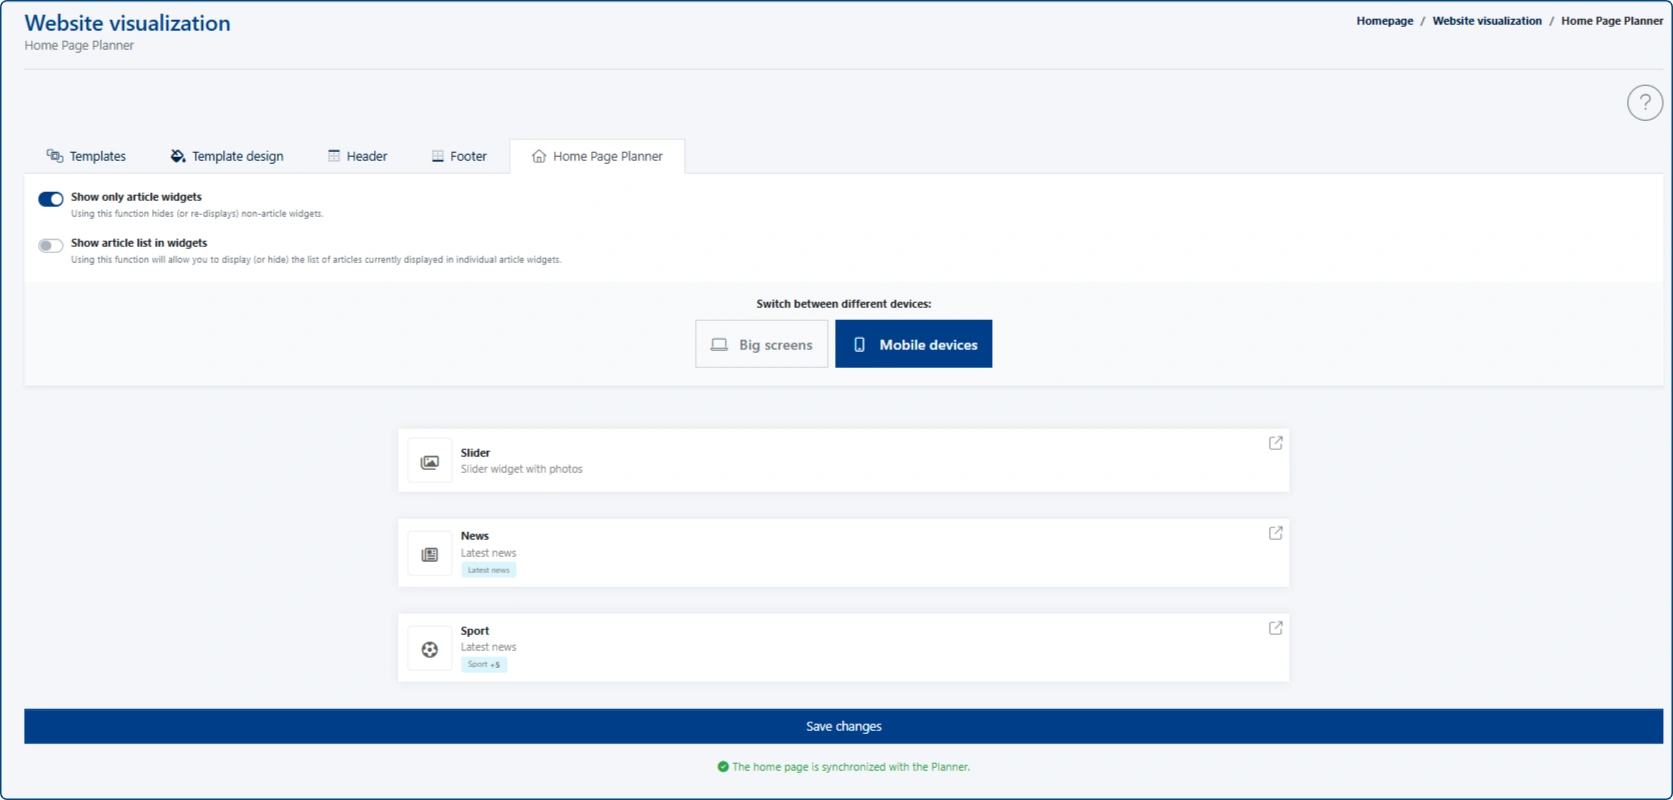
- Show only article widgets – using this option hides (or shows again) widgets other than article-based ones.
- Show article list in widgets – using this option allows you to display (or hide) the list of articles currently published within individual article widgets.
The planner also allows you to manually change the layout of articles displayed in widgets—separately for desktop and mobile versions. This means you can have a different order on mobile devices and a different one on desktops or laptops.

Which widgets are managed by the Planner?
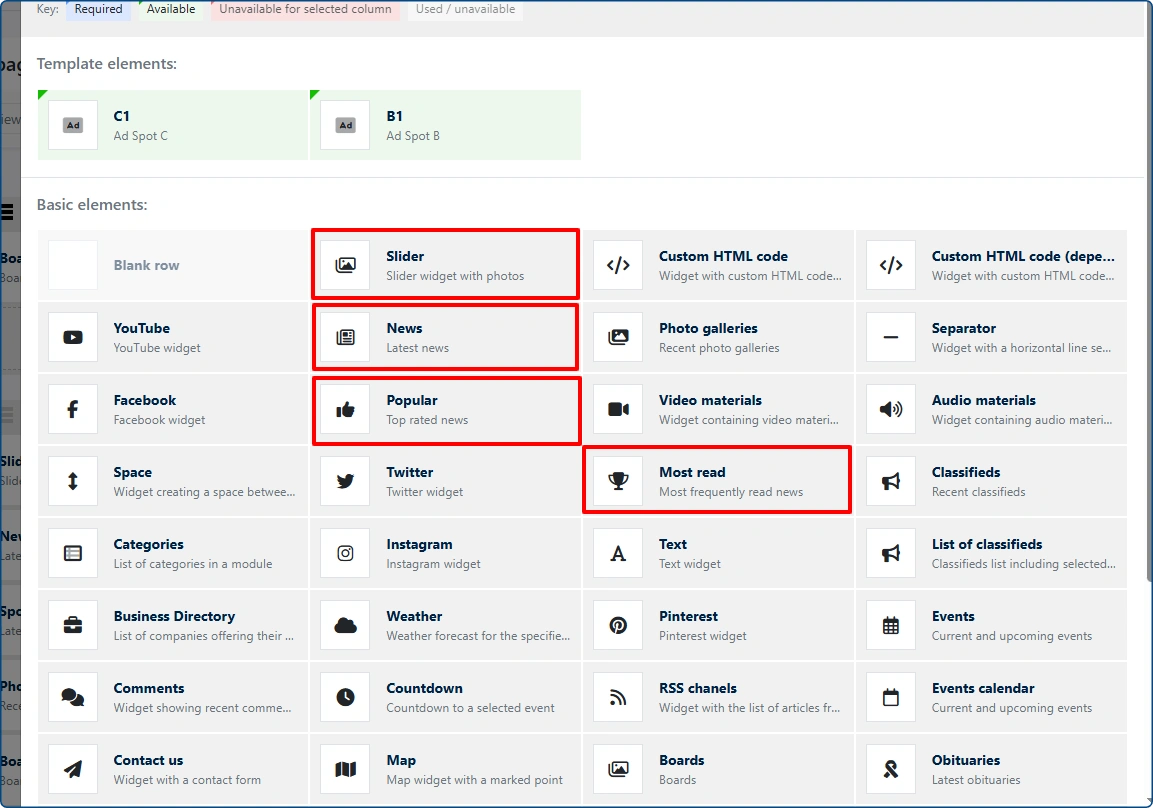
Using the Planner, you can control the content displayed in the following widgets:
Explore the Planner’s capabilities
- Larger image thumbnails in the tile layout
- Introduction of numbered slots in each widget
- A button for quick access to widget edit mode in the page builder (in the top-right corner of each widget)
- Clicking the widget header (white background) takes you to the widget’s overall settings (where you manage the view of all slots in a given widget)
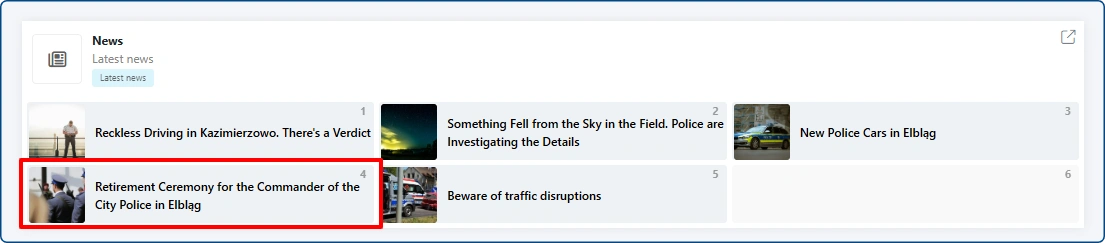
- Articles pinned to a widget are highlighted with a blue background
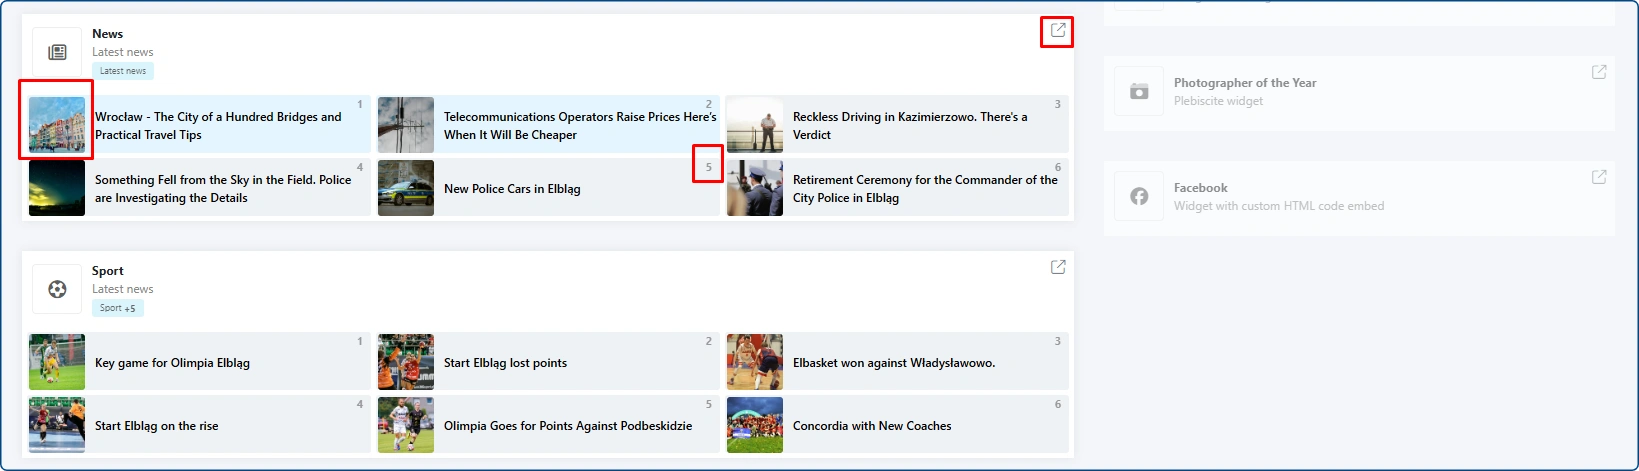
Homepage widget management – desktop version view
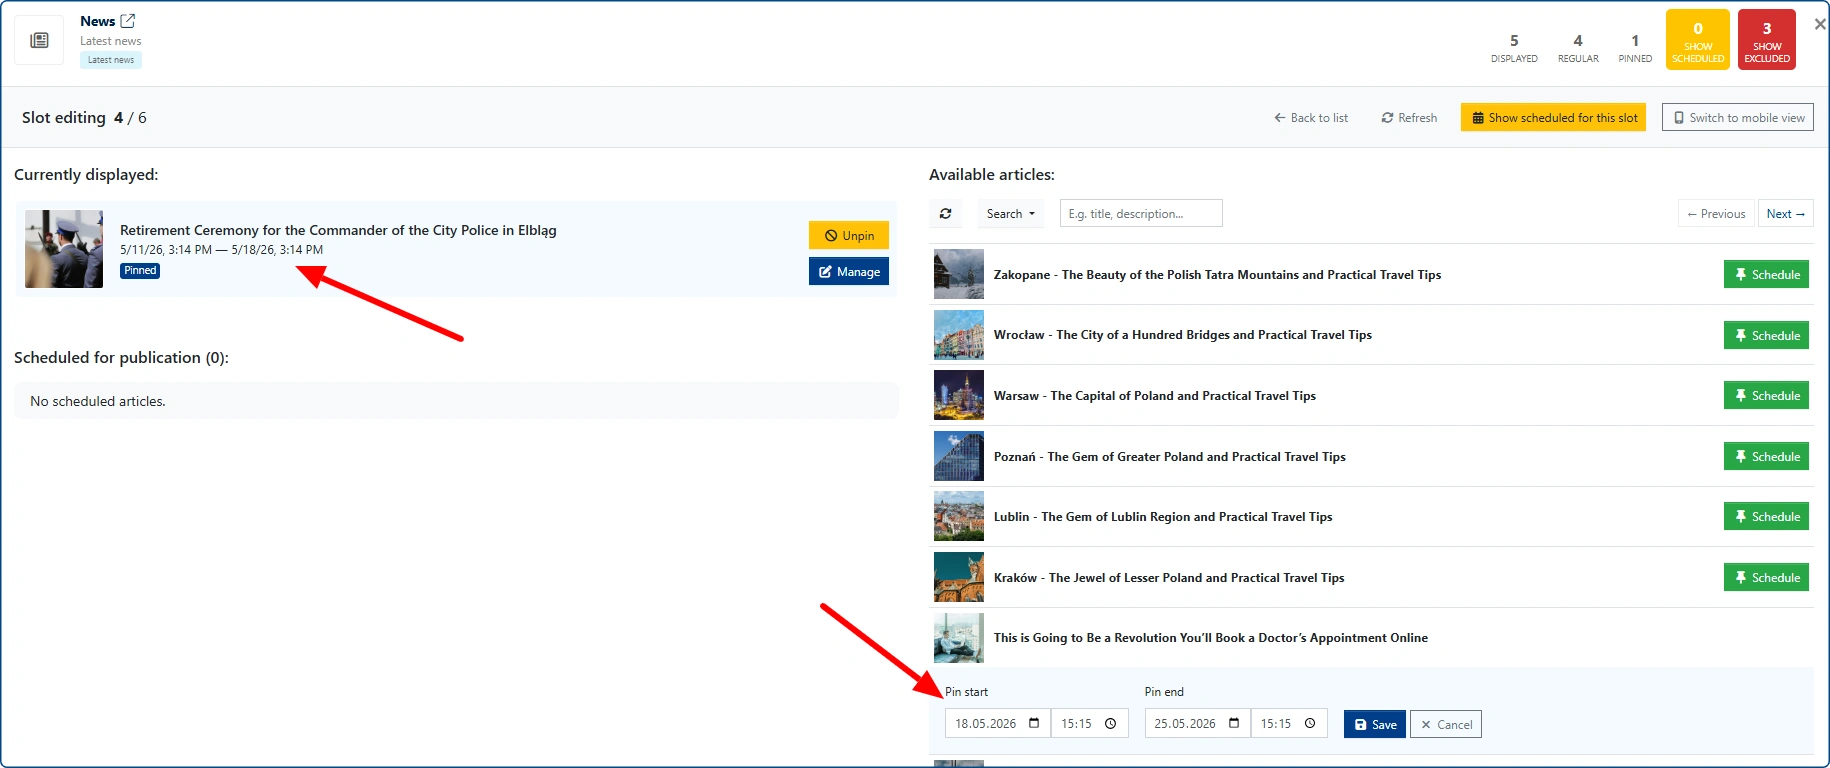
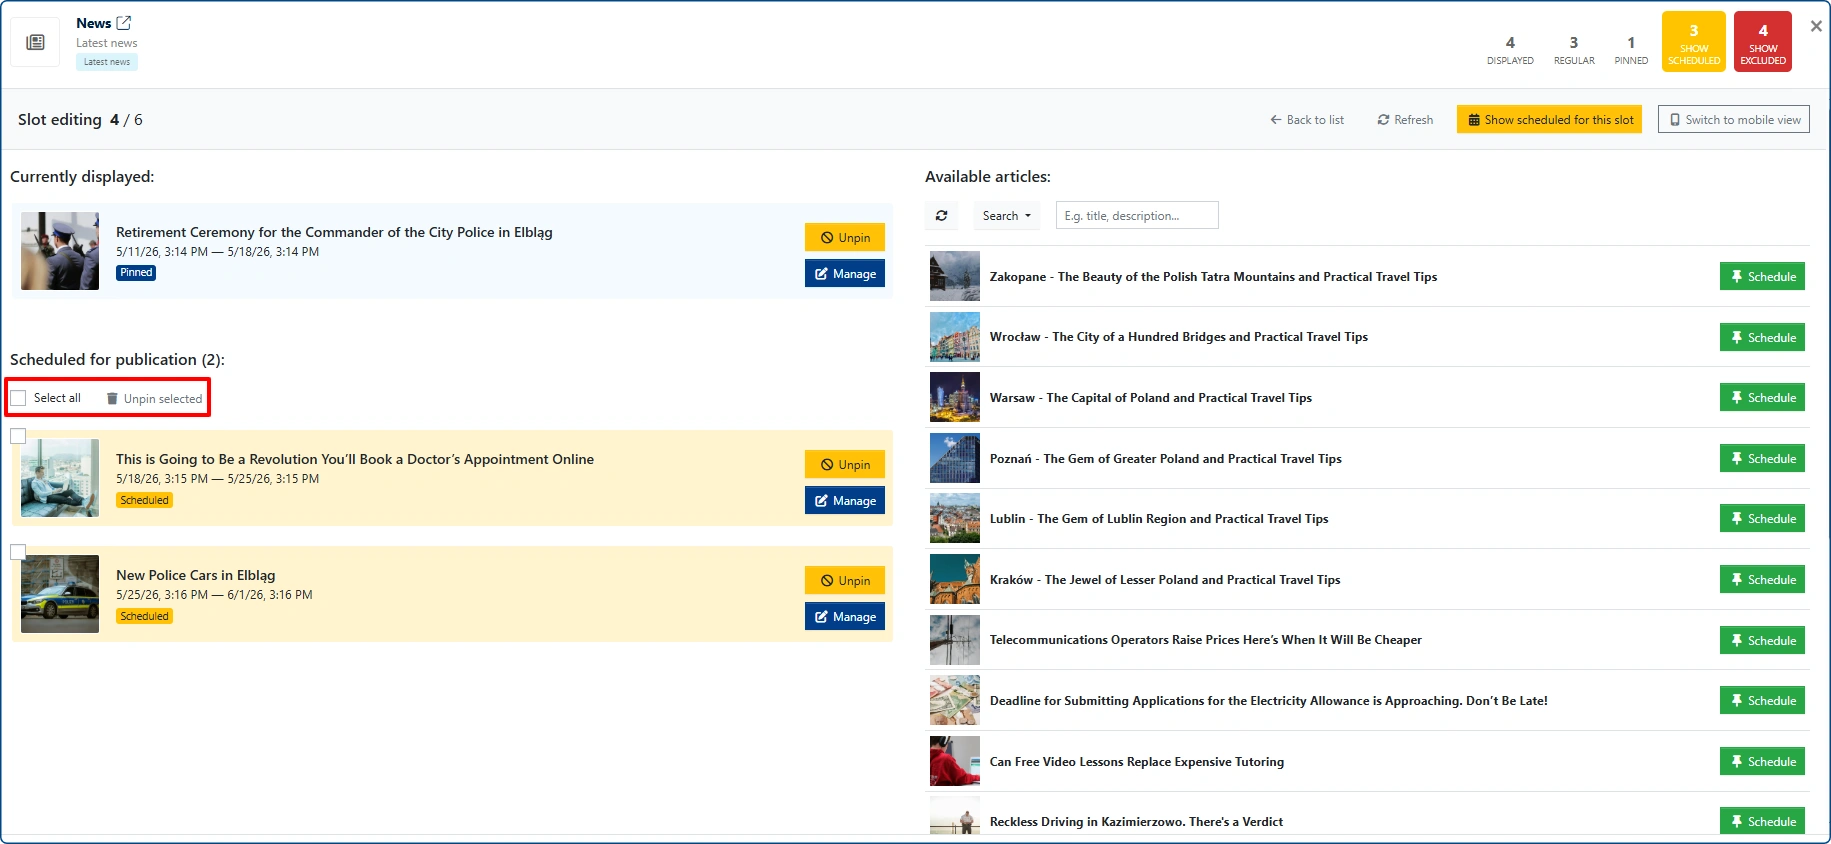
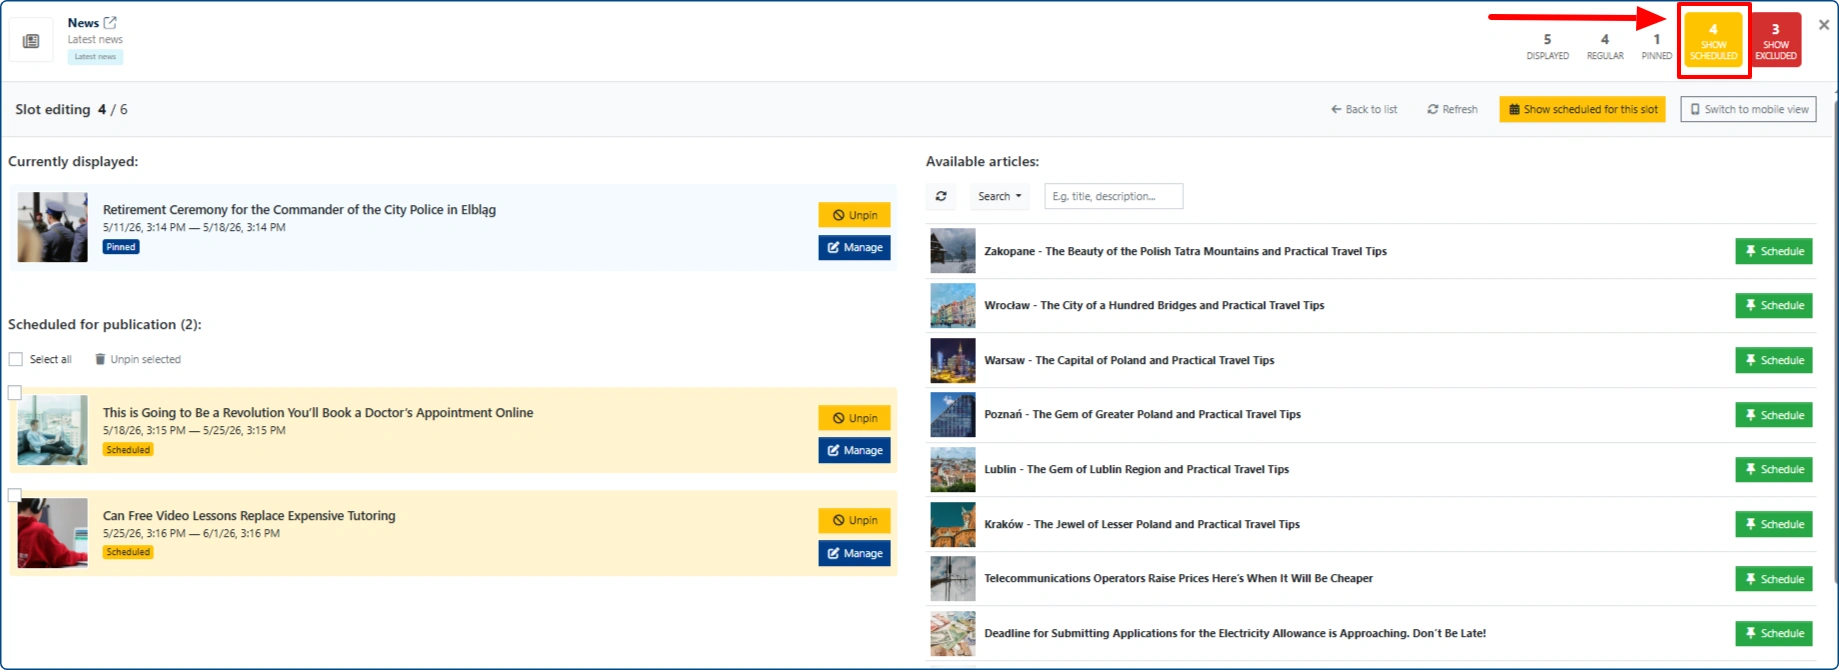
Clicking on a specific slot within the widget
opens a pop-up window that allows you to pin an article in that exact spot. Each position has its own queue of scheduled articles (but we exclude entries at the widget level).
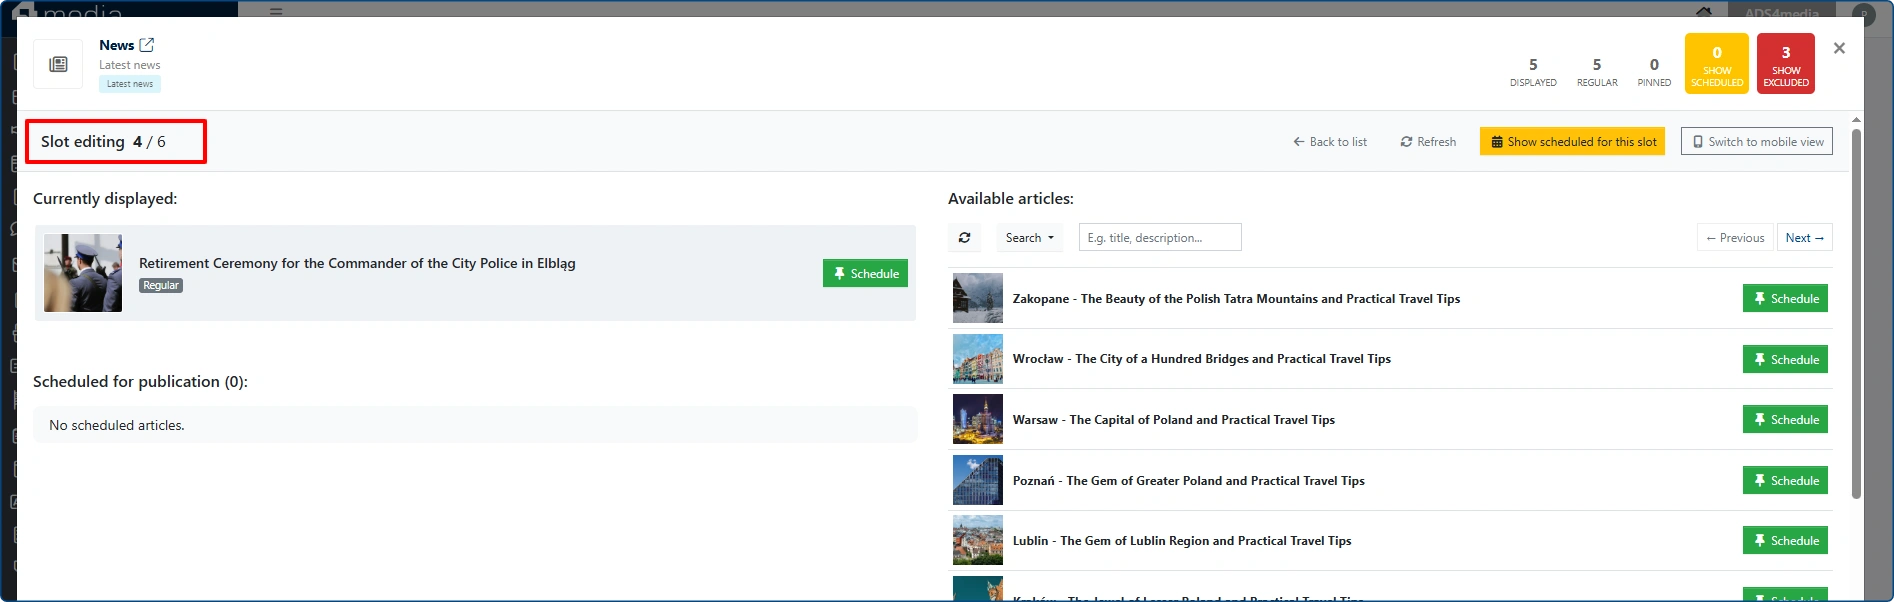
Below / above is a view of the functionalities available for a specific slot within the widget. Each slot has its own queue of scheduled entries, but exclusions are applied per widget. This is the biggest change compared to the original version of the planner.
The left side of the pop-up window displays information about the currently shown entry. In the bottom-left corner, there is a designated area for scheduled (pinned) entries planned for publication.
The entry currently displayed in the widget (according to the widget’s default settings) is marked in the planner with a gray label REGULAR.
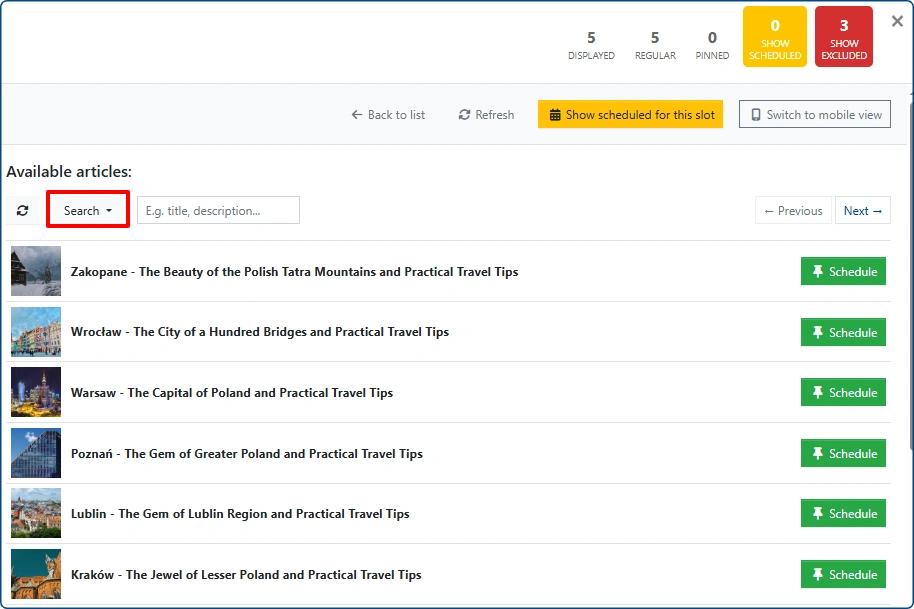
To pin an article (or schedule it to be pinned in the future), click the green SCHEDULE button.
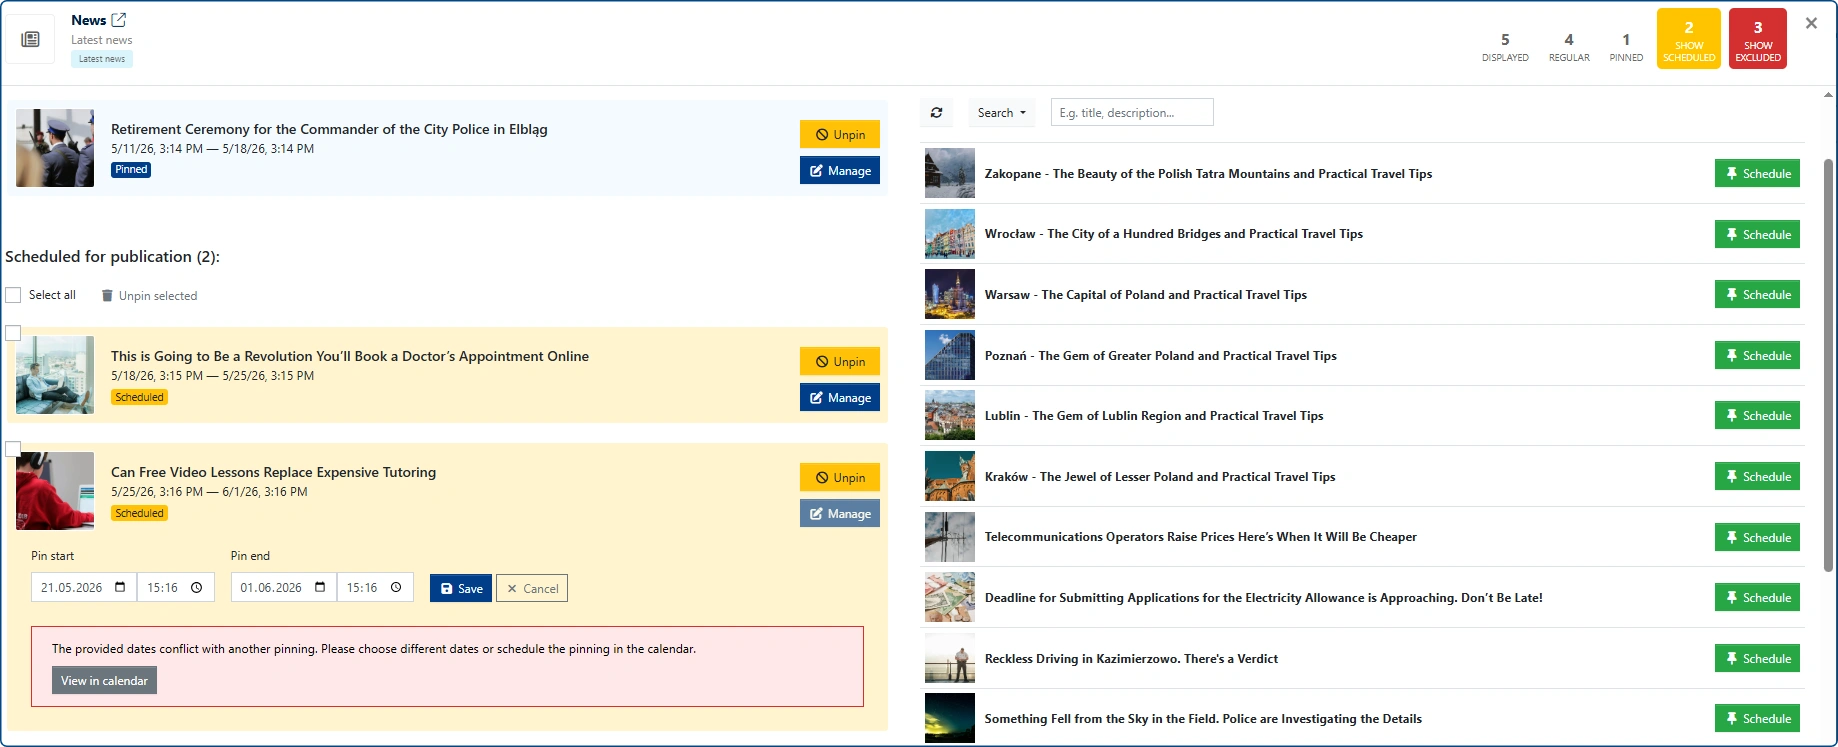
Pinning an entry requires to provide a start and end date. The system does not allow selecting a past date—it can only be done with the current one or scheduled for a future date.
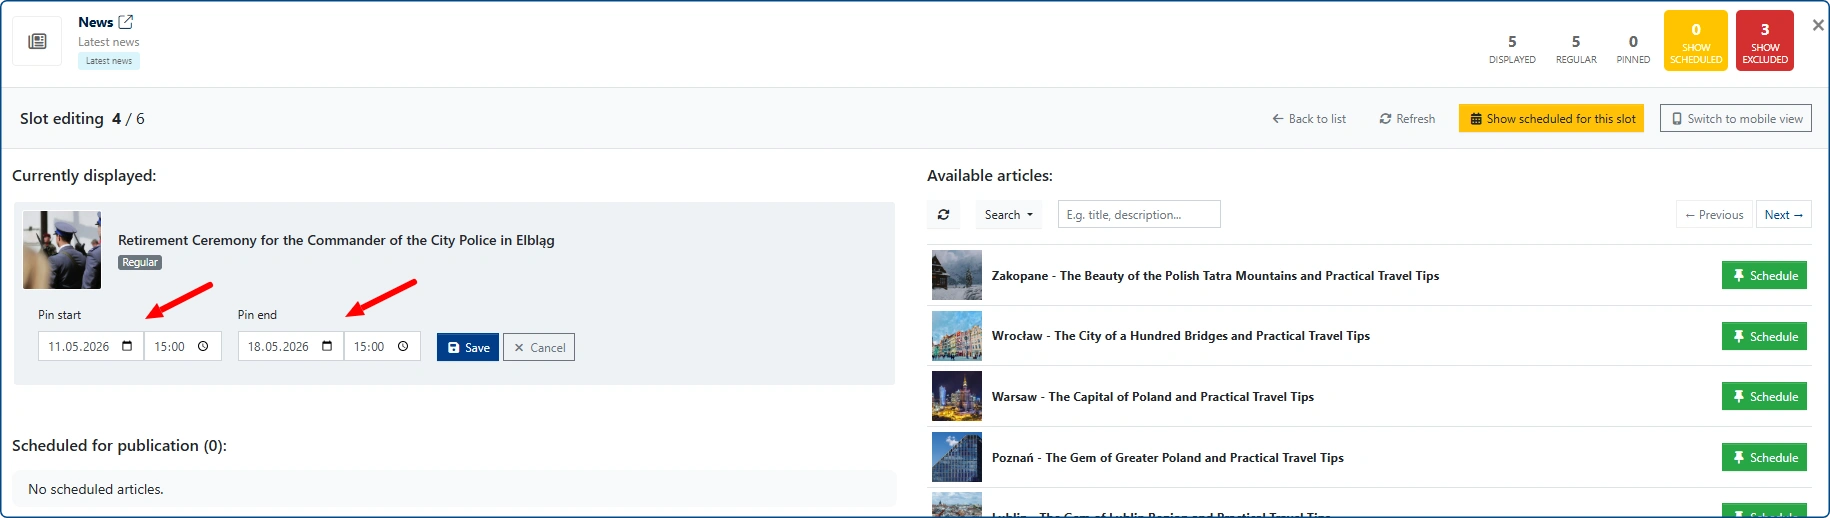
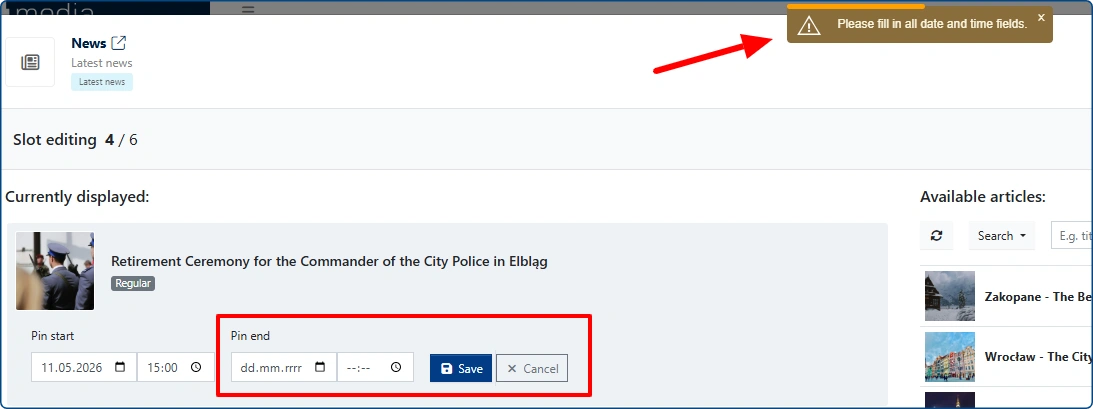
IMPORTANT: The planner will not save changes if the end date has not been selected.
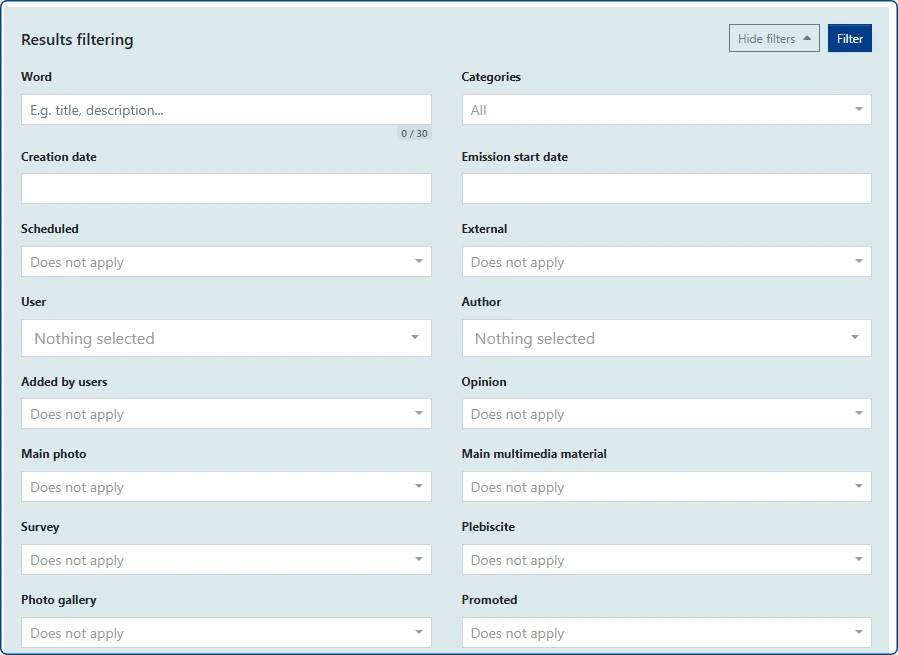
The right side of the window contains the list of entries available for selection, as well as advanced filtering options. It creates a possibility to quickly schedule the publication of another article.
If the article currently displayed is already pinned to a slot in the widget, the next article scheduled for that slot is automatically set in time to smoothly replace the currently displayed entry.
Of course, the default timing can be changed, but it is not possible to schedule two different articles for the same slot within the same time range. You must first adjust the pinning time (or unpin) the currently pinned entry, and then pin a new article in its place.
After scheduling the publication of the next entry, it will appear on the left side of the pop-up window.
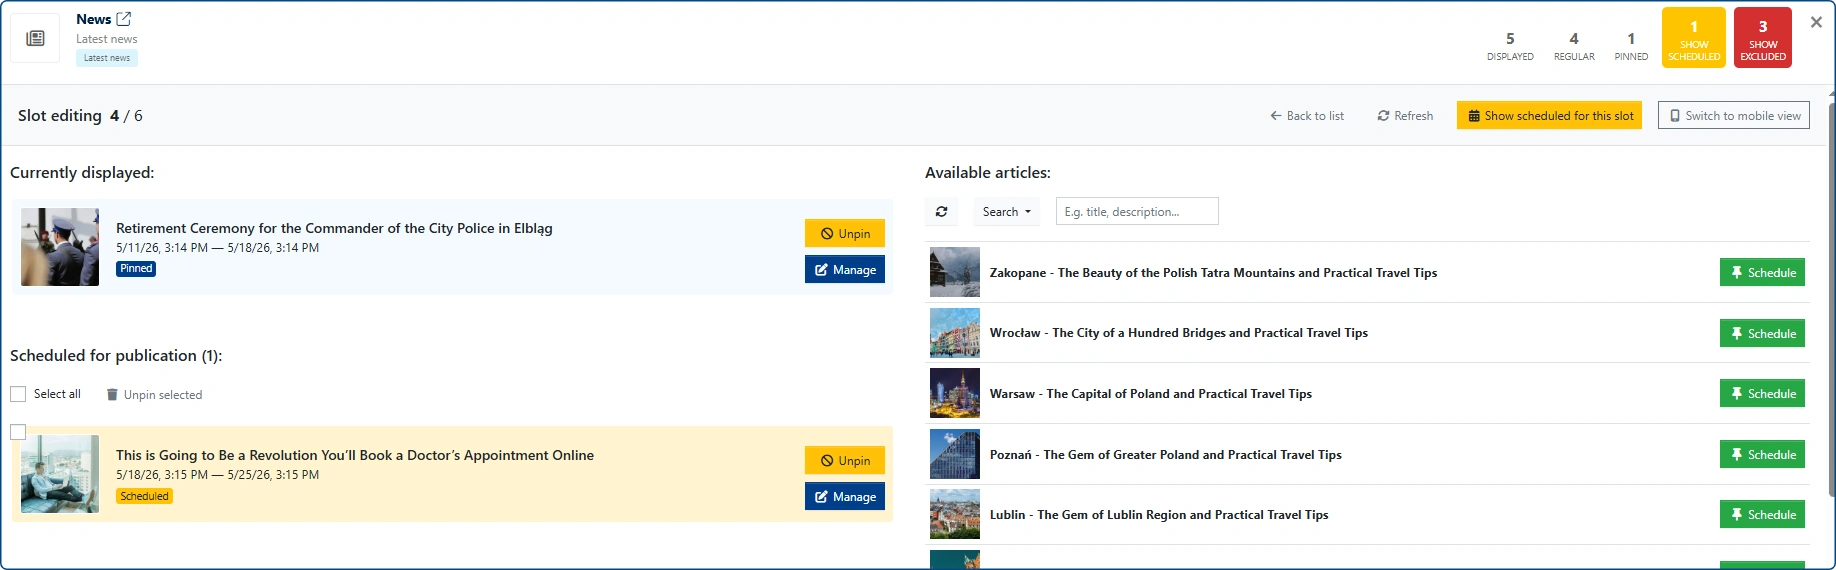
If you queue multiple entries, they will form a list that also includes additional options: [Select all] and [Unpin selected].
If you try to schedule two articles for publication in the same location at the same time, the system will display an appropriate alert.
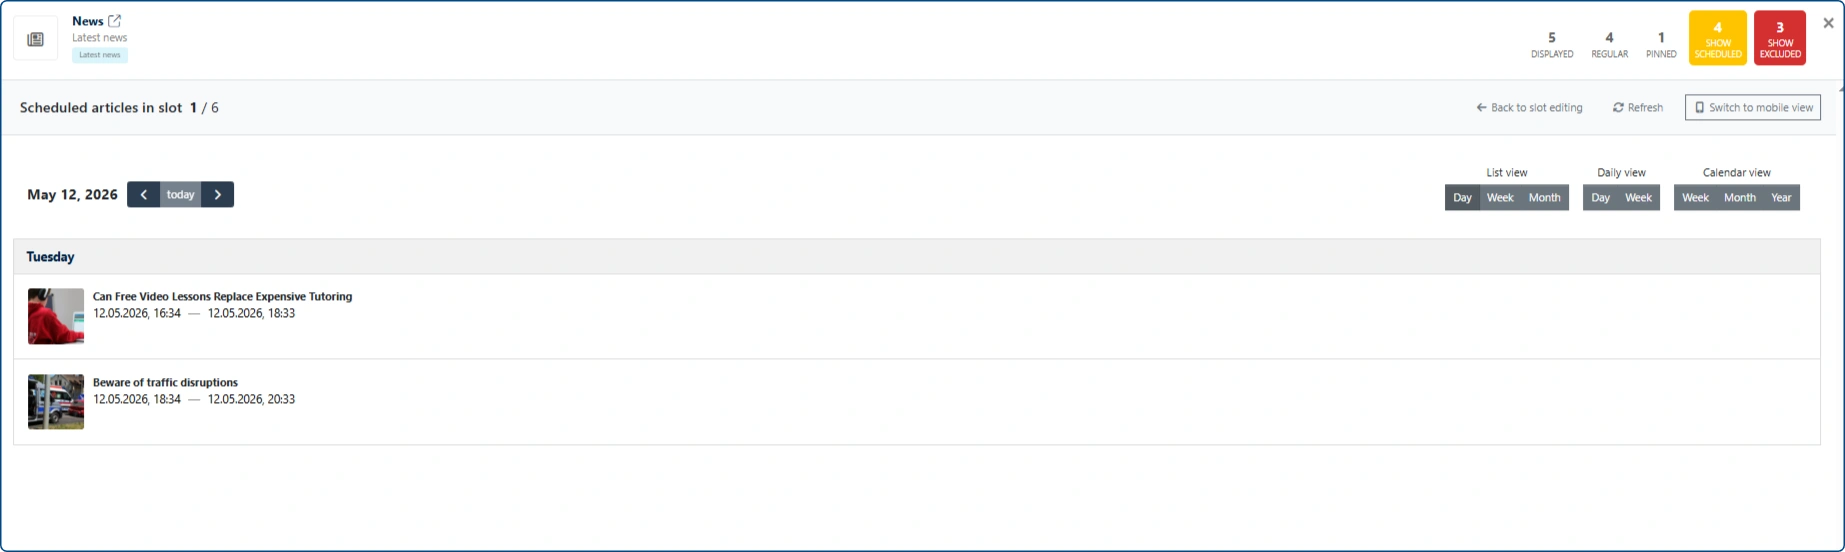
Calendar
Clicking the [Show scheduled for this slot] button takes us to the calendar view.

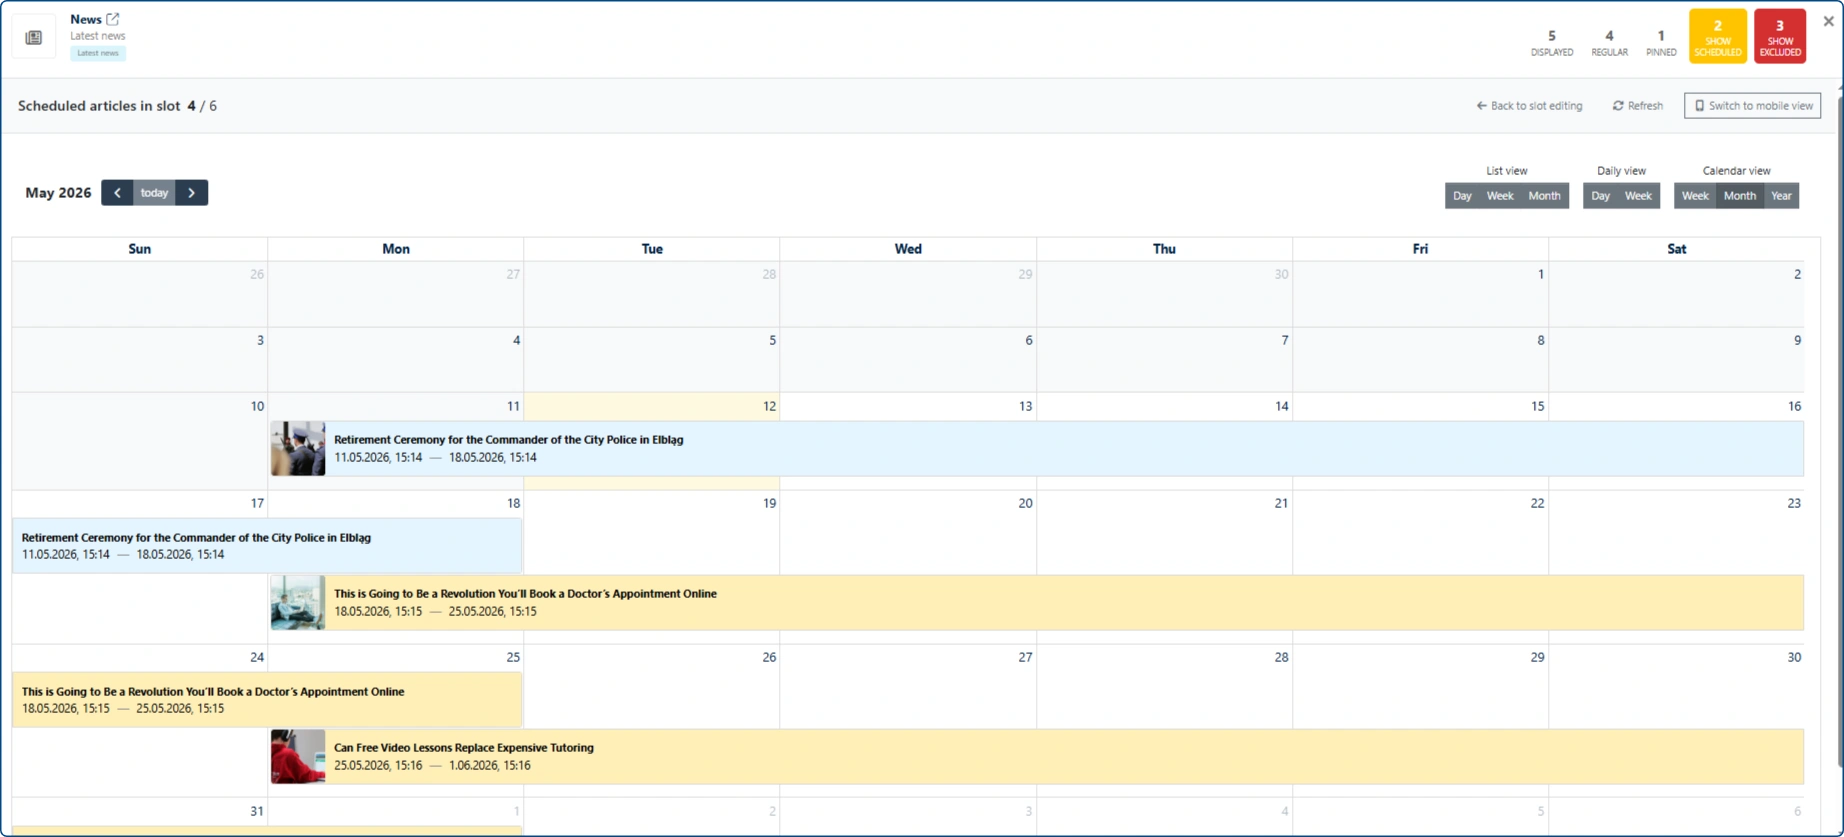
The calendar allows switching between different views:
- List view (day, week, and month)
- Daily view (day and week)
- Calendar view (weekly, monthly, and yearly)
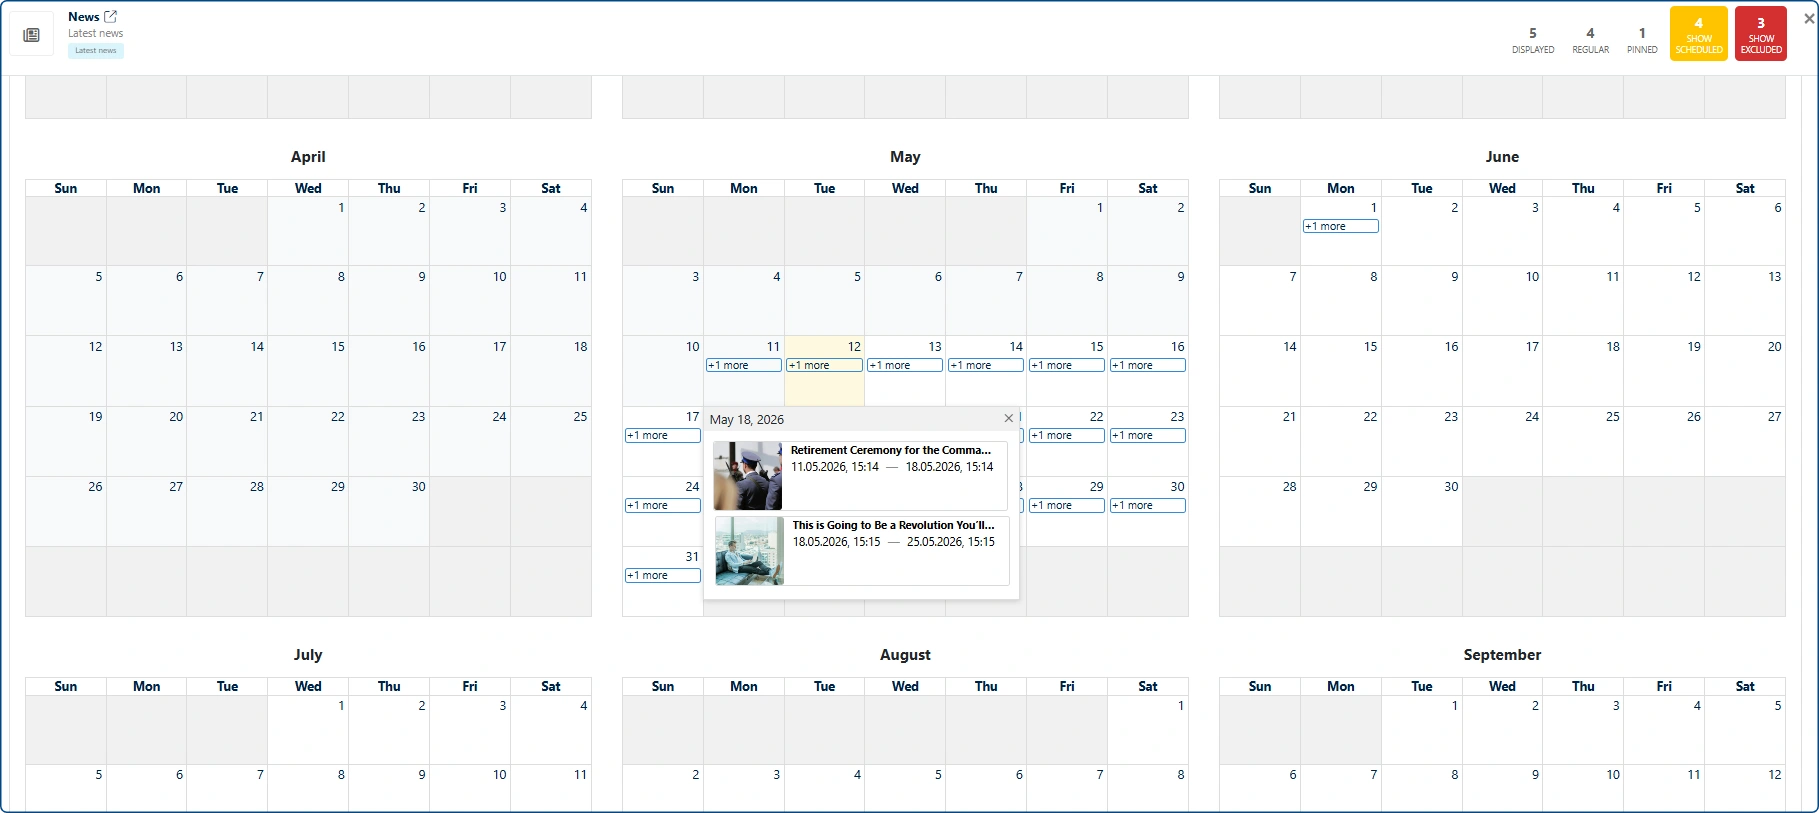
Articles scheduled for publication
If articles scheduled for online publication are added to the CMS, they will be marked in the Planner with the label SCHEDULED.
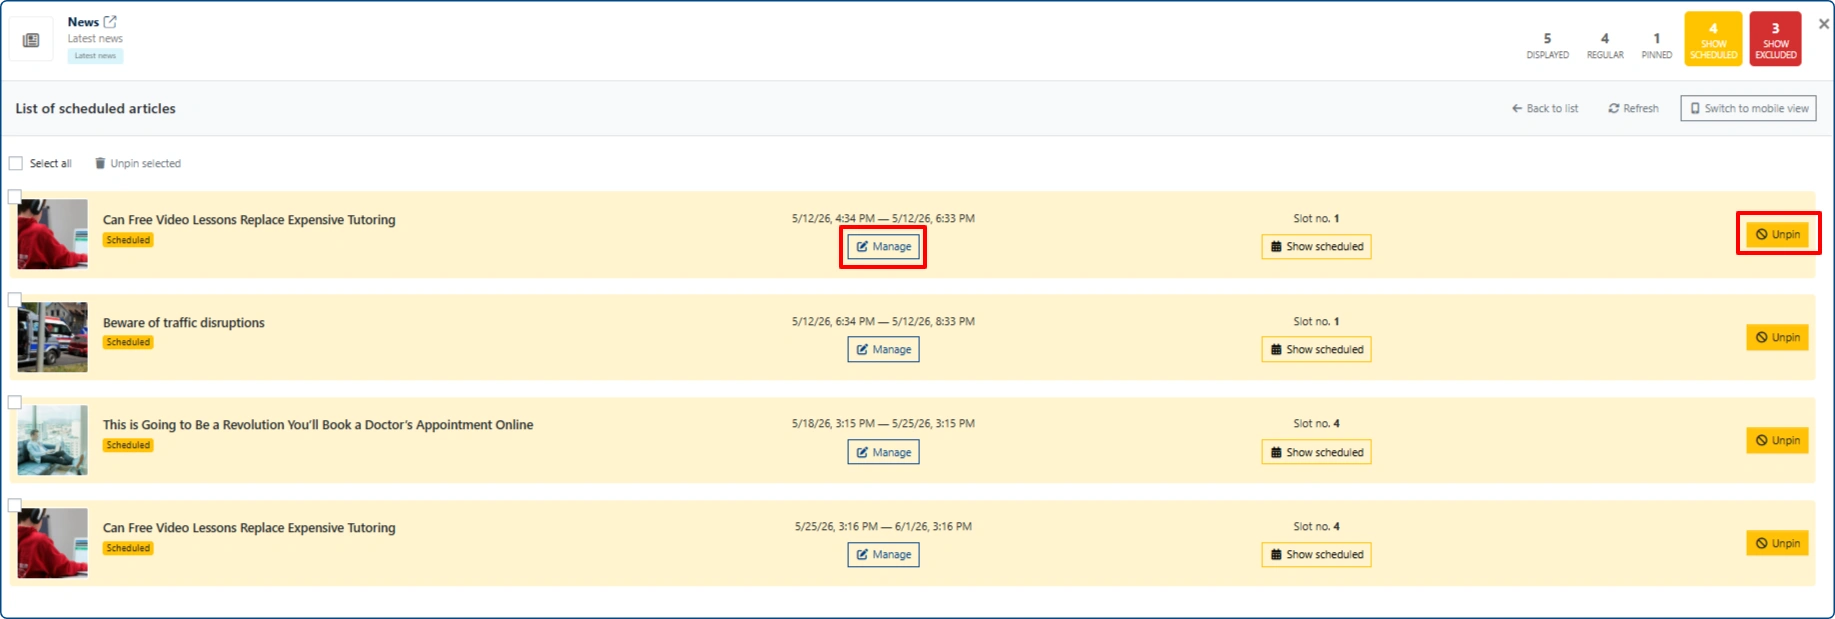
List of scheduled entries
A consolidated list of articles pinned/scheduled for publication in a specific widget is available. We access it by clicking the large yellow button [Show scheduled] in the top-right corner of each edited widget.
In the list view, we can:
- Unpin a scheduled entry by clicking the Unpin button
- Change the date and time of scheduled pinned entries by clicking the Manage button
- Switch to the calendar view and check entries queued for publication in a selected widget slot by clicking the Show scheduled button
Clicking the Manage button allows you to quickly change the pinning time or unpin an article (unpinning is not the same as excluding it).
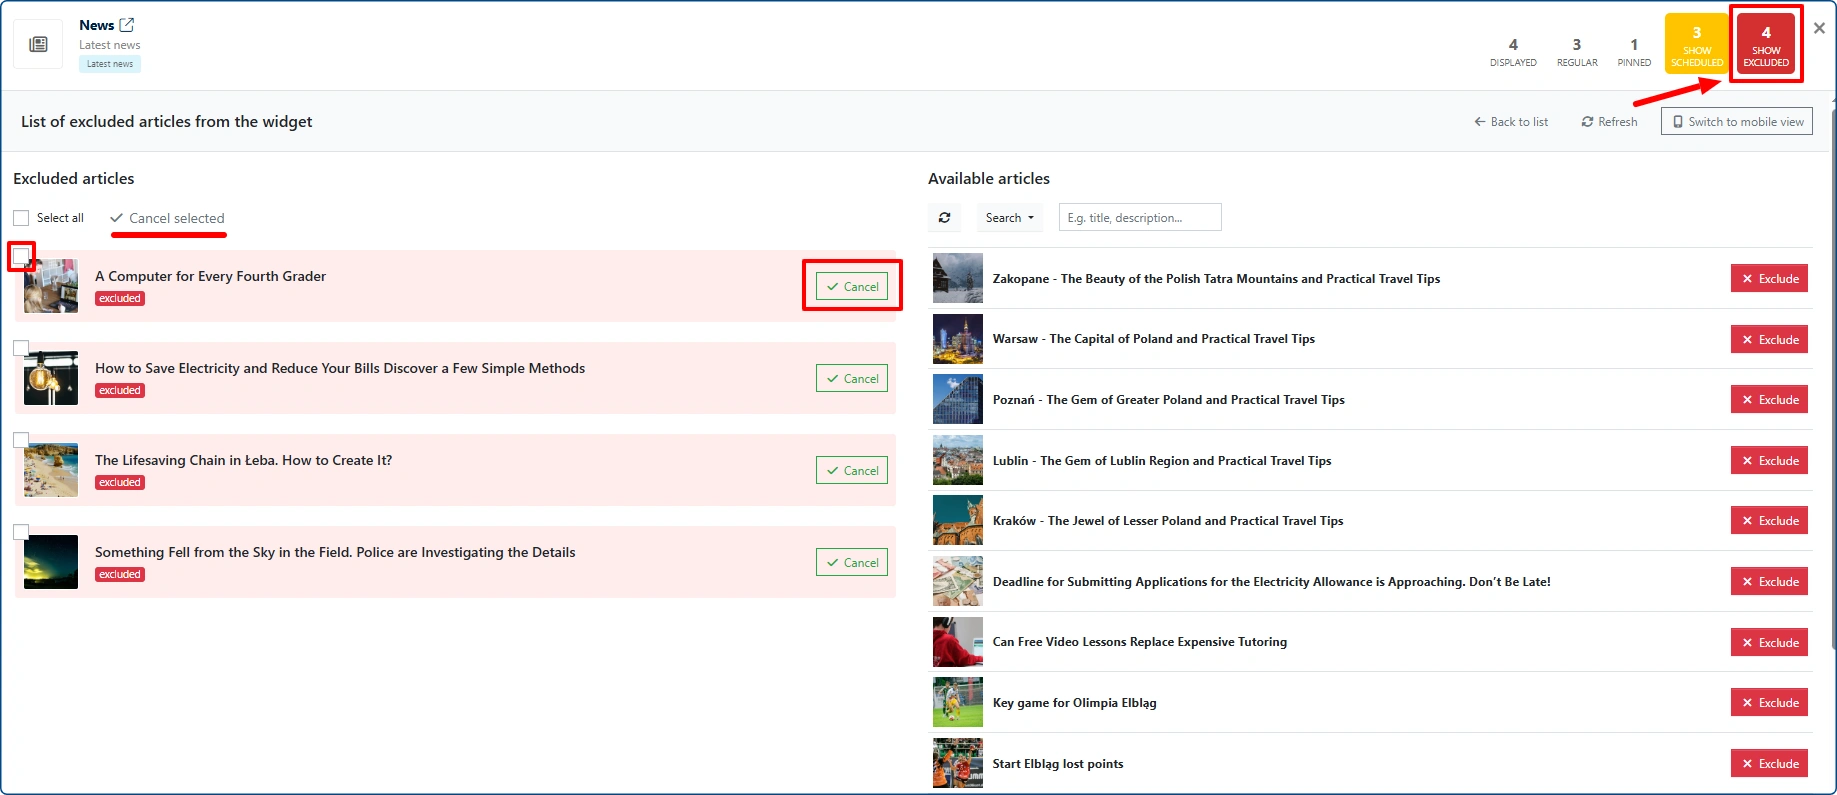
Exclusions list
The exclusions list in a widget is limited. This means that if a given widget reaches 50 exclusions, the system will automatically remove the oldest ones when a new exclusion is added. You can access it by clicking the SHOW EXCLUDED button in the top right corner.
To exclude an article from publication in a widget, go to the exclusions list and click the Exclude button next to the article title. Such an article will then appear in the list on the left side of the window.
To undo an exclusion, click Cancel or select multiple entries and choose the Cancel selected option.
Additional information
Good to know #1
Once you start using the Planner’s individual features, the top section of the pop-up window will display information about the number and type of articles currently shown in the widget.

Good to know #2
The “Back to list” button, when clicked, will display the full widget edit mode view.
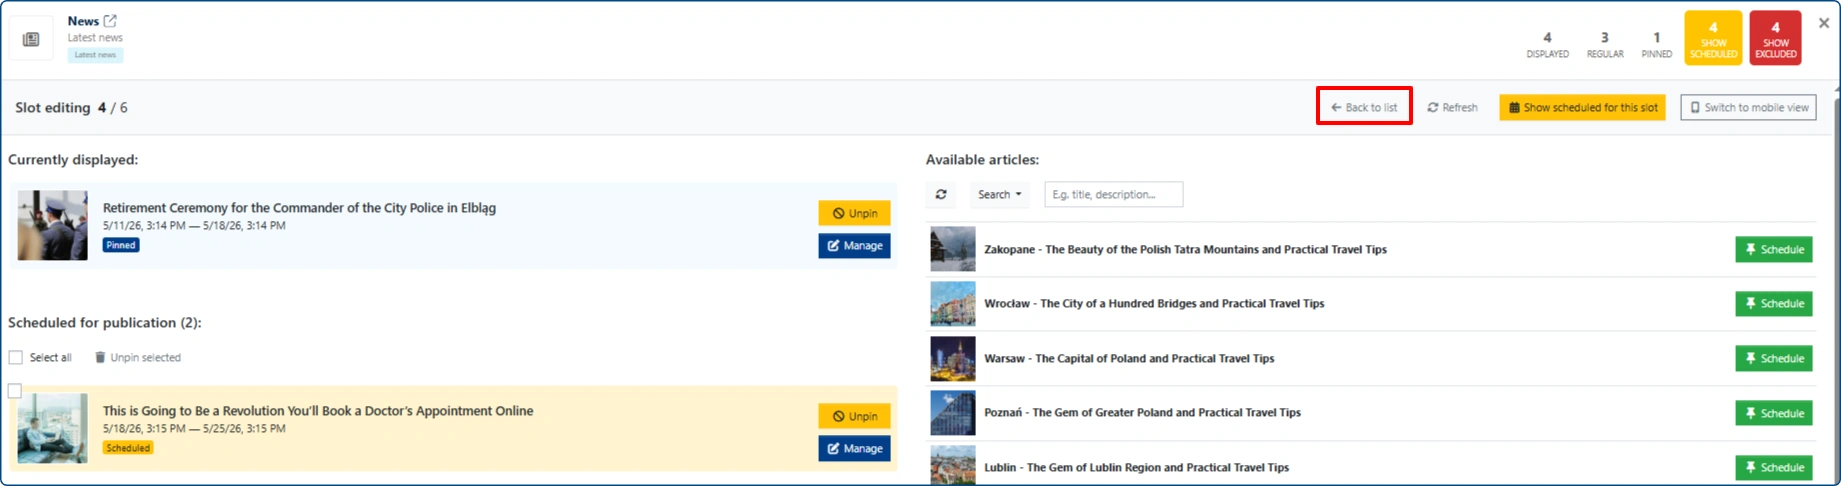
In this window, we see a list of currently displayed articles. We can go to the management of a specific slot in the widget by clicking on a specific item. A pinned entry is highlighted with a light blue background, while “standard” entries are not visually distinguished.
If there are any upcoming pinned/scheduled articles for a given slot, a marker with a yellow background will appear in the bottom-left corner of the image, indicating the number of queued pinned entries.

Good to know #3
The “Switch to mobile view” button will be available in the widget slot edit mode only when the widget has display enabled for all device types (desktop and mobile version). Clicking this button allows you to manage article pinning in the mobile version.
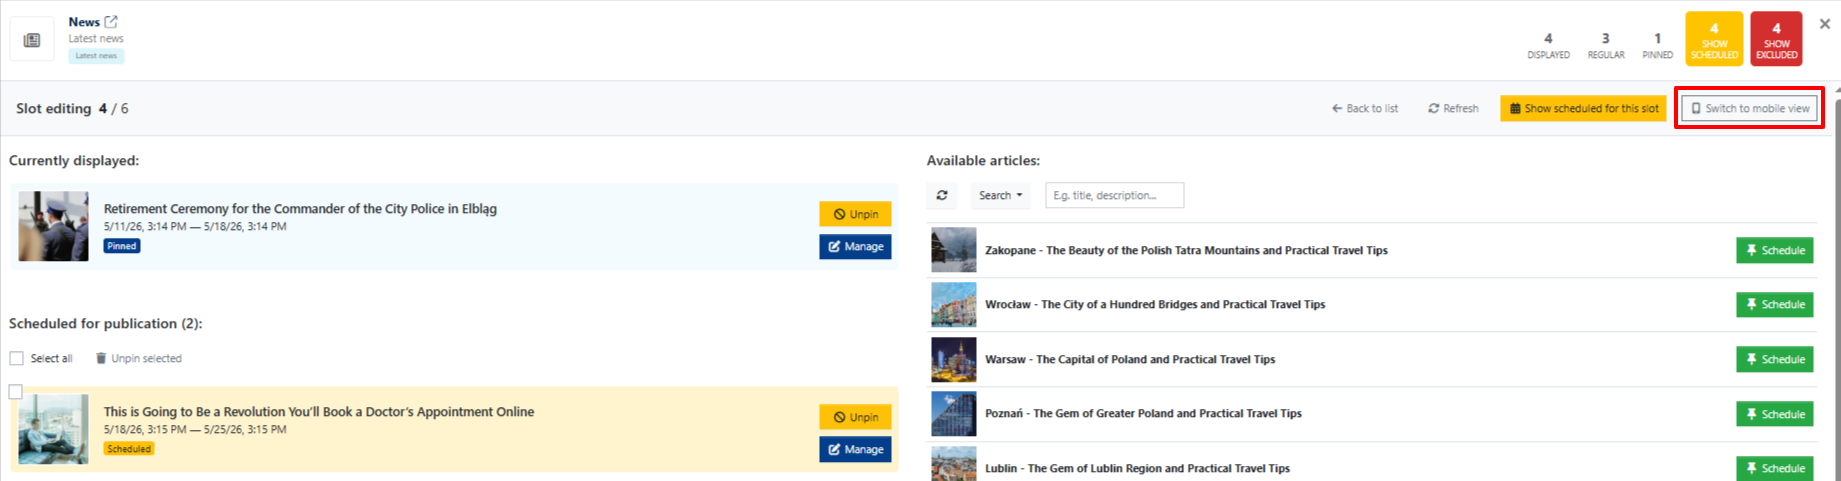
If the portal’s homepage has separate widgets enabled for the desktop and mobile versions, this button will not be available here.

Instead, the planner should display the pool of widgets targeted at mobile devices. To do this, click the blue [Mobile devices] button and proceed to edit them.
Good to know #4
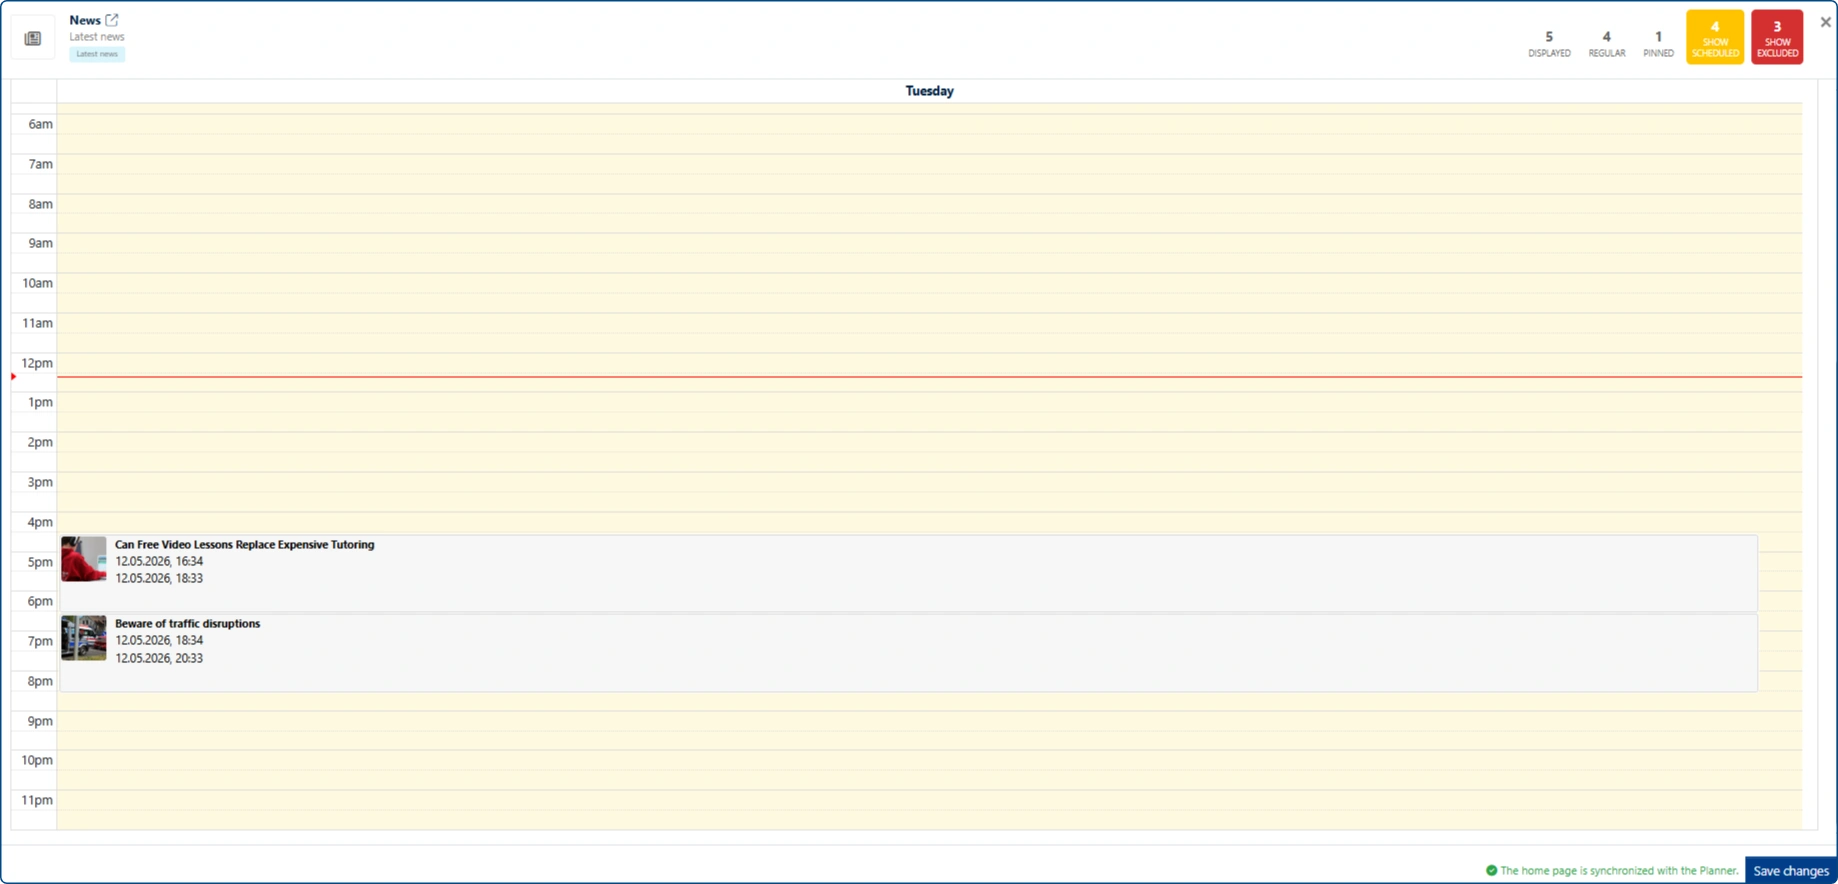
Another new feature visible in the image above is a message highlighted in green, informing about synchronization between the planner and the page builder (or the lack of it).
Any change made in the planner (pinning, scheduling, or excluding an article from publication) requires re-synchronization with the page builder.
Example shown in the image below: an article has been pinned—at the same time, a reminder message appears at the bottom of the pop-up window indicating that the planner needs to be synchronized.
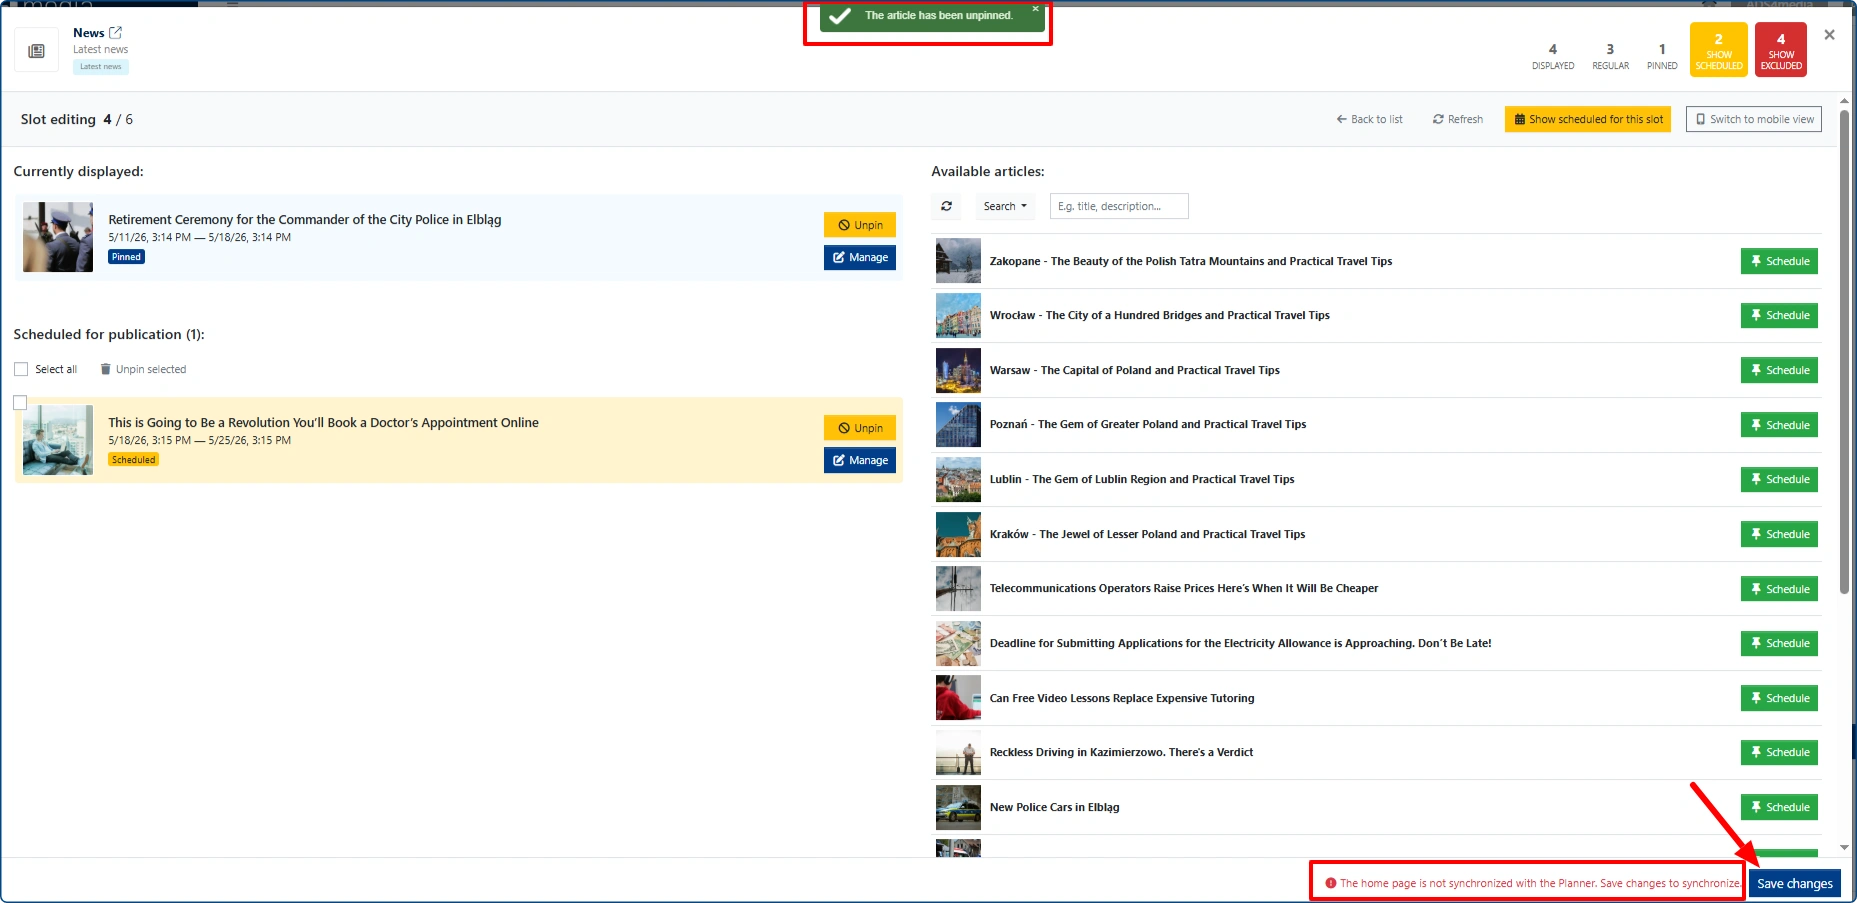
Clicking the “Save changes” button will synchronize the planner with the homepage, making the pinned article visible on the homepage.

")

