
Where to find the new features?
The [Content Hub] is located in the left sidebar menu of the CMS 4media admin panel.
When you open the module, you will see the following buttons:
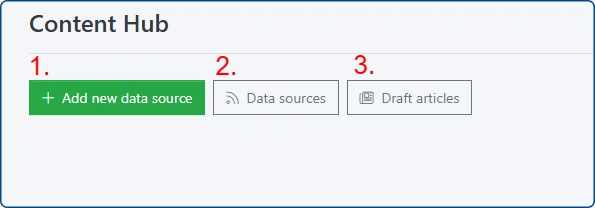
- Add new data source – redirects to a short form for adding an RSS feed as a new source for third-party articles.
- Data sources – takes you to the list of already added sources.
- Draft articles – redirects to a list of "drafts," which are articles the system has read from the provided RSS feeds. These appear only after the added sources have been scanned.
Adding a data source
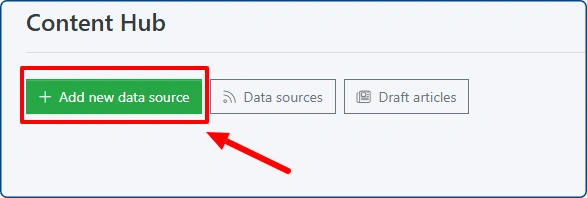
Click the first green button, "Add new data source."
You will be redirected to a short form containing the following fields:
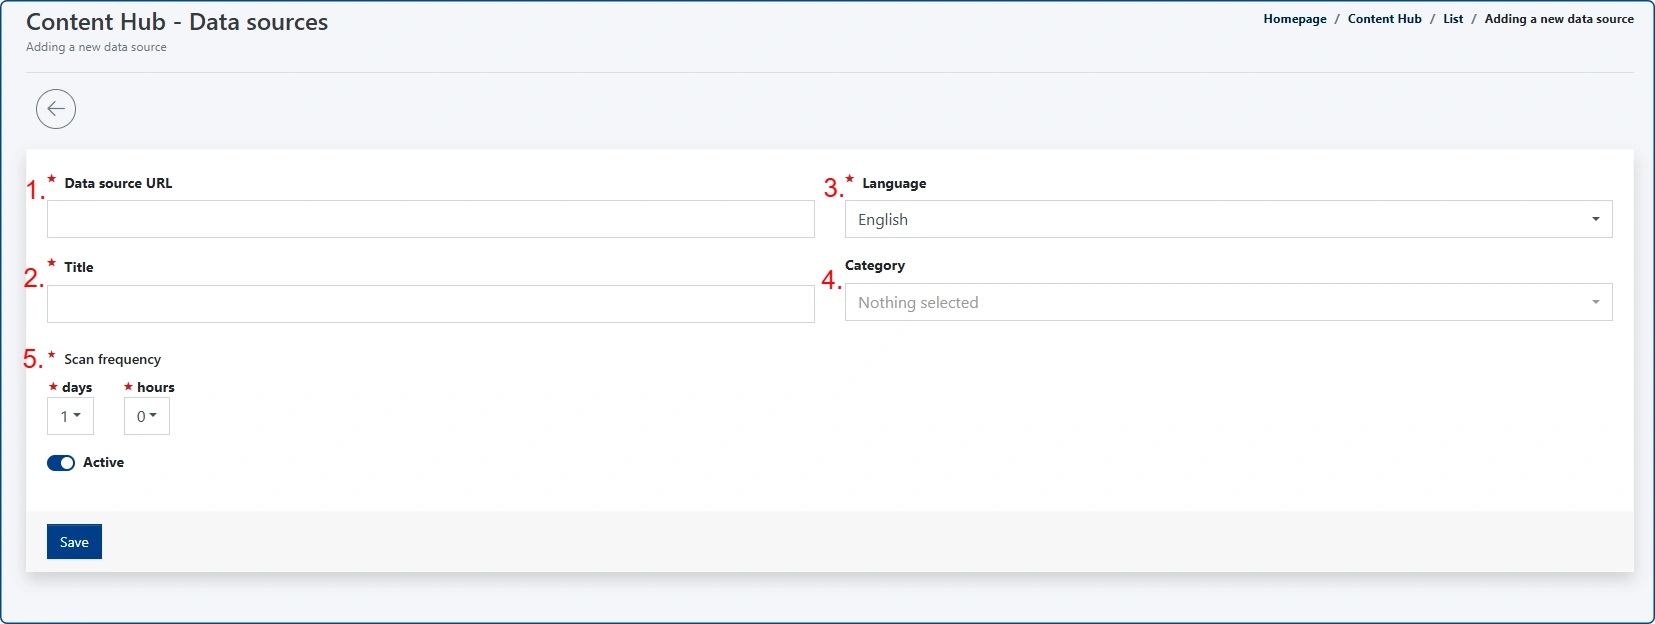
- Data source URL – paste the link to your chosen RSS feed here.
- Title – name the data source for your own convenience.
- Language – select the language of the RSS feed from the dropdown list.
- Category – select the default article category to which the AI-generated articles from this source will be assigned.
- Scan frequency – settings for automatic scanning of the RSS feed. This eliminates the need to manually check for new articles.
After filling in all required fields (marked with an asterisk), click "Save."
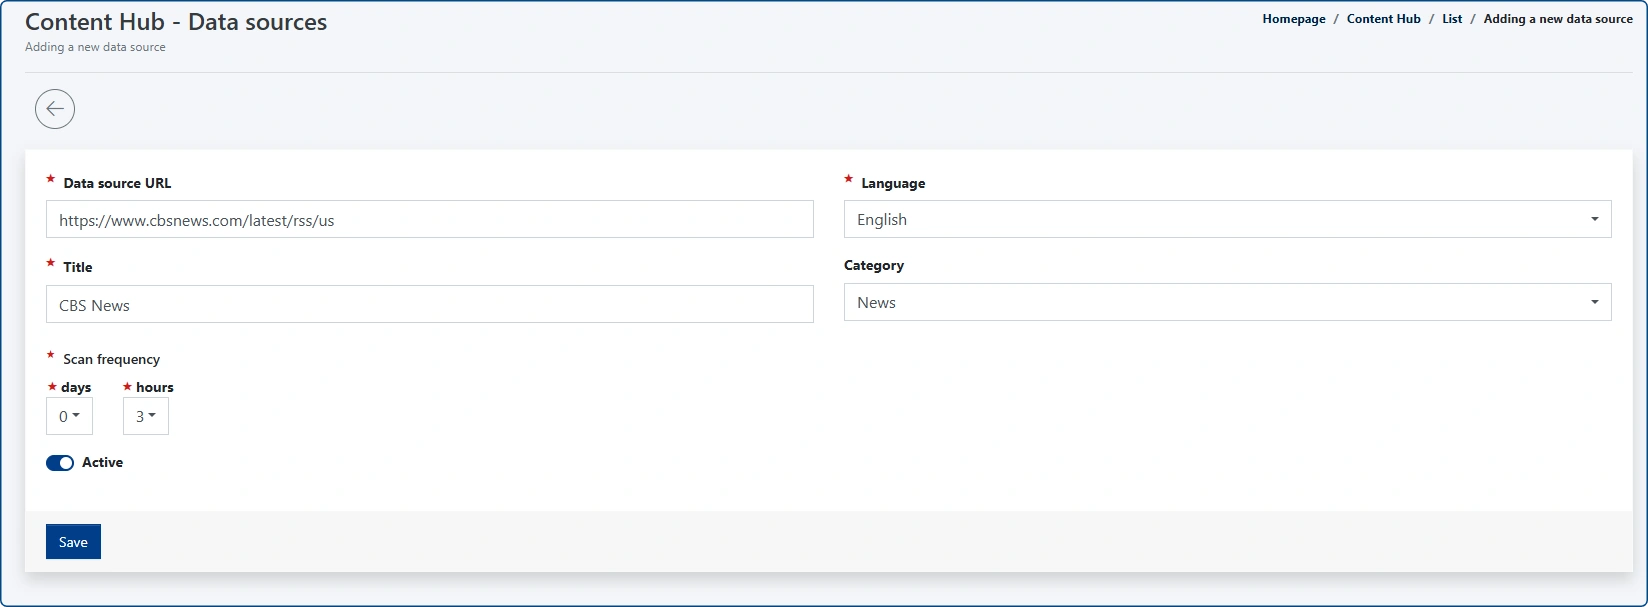
Once the page reloads, you will see the view of your newly added data source. The top section shows a summary of your settings, while the "Draft articles" section below lists entries retrieved from the RSS feed.
Initially, this list will be empty because the source hasn't been scanned yet.
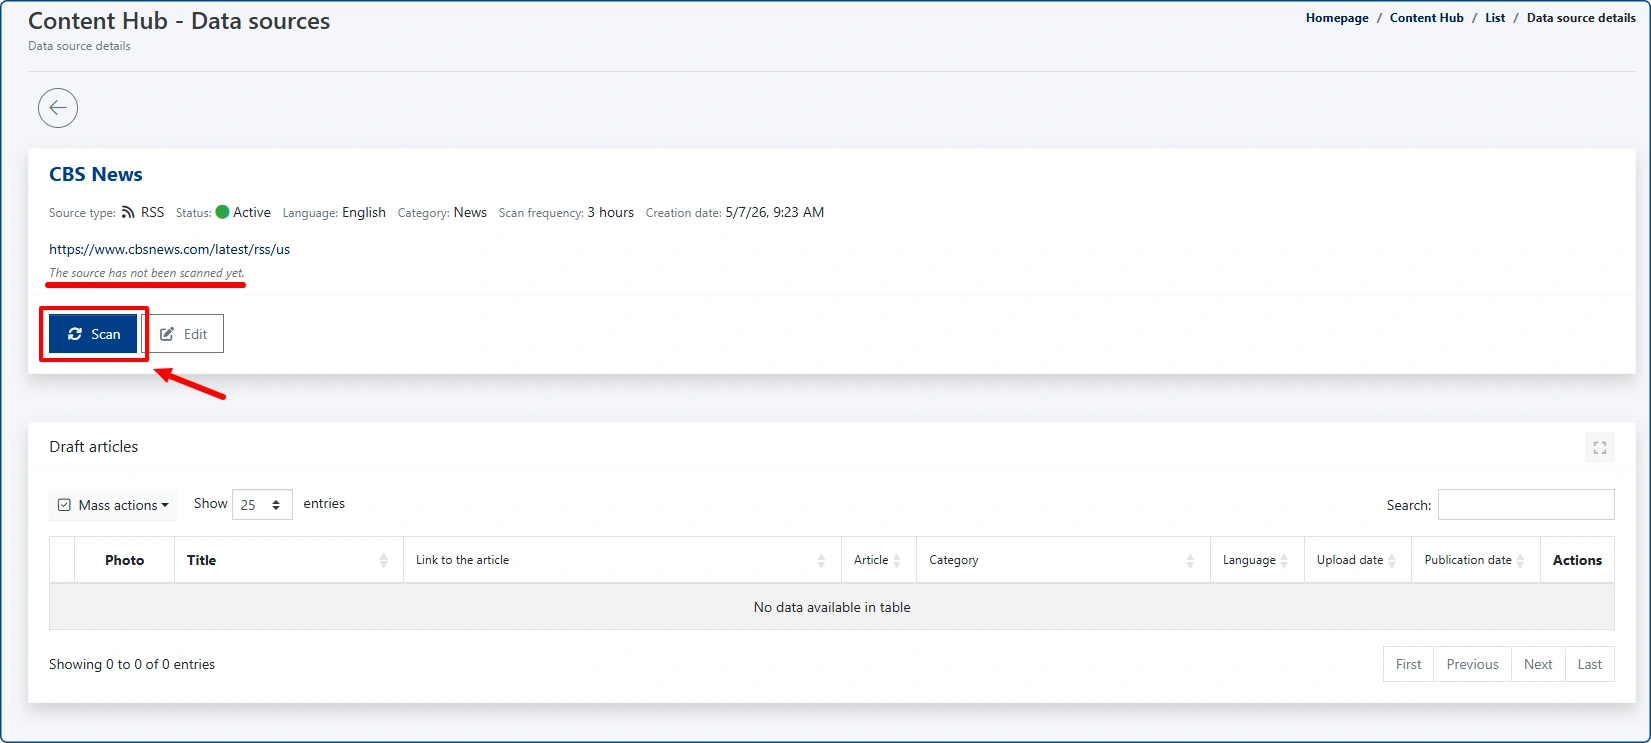
To fix this, click the blue "Scan" button to perform the first read and populate the list with the latest posts.
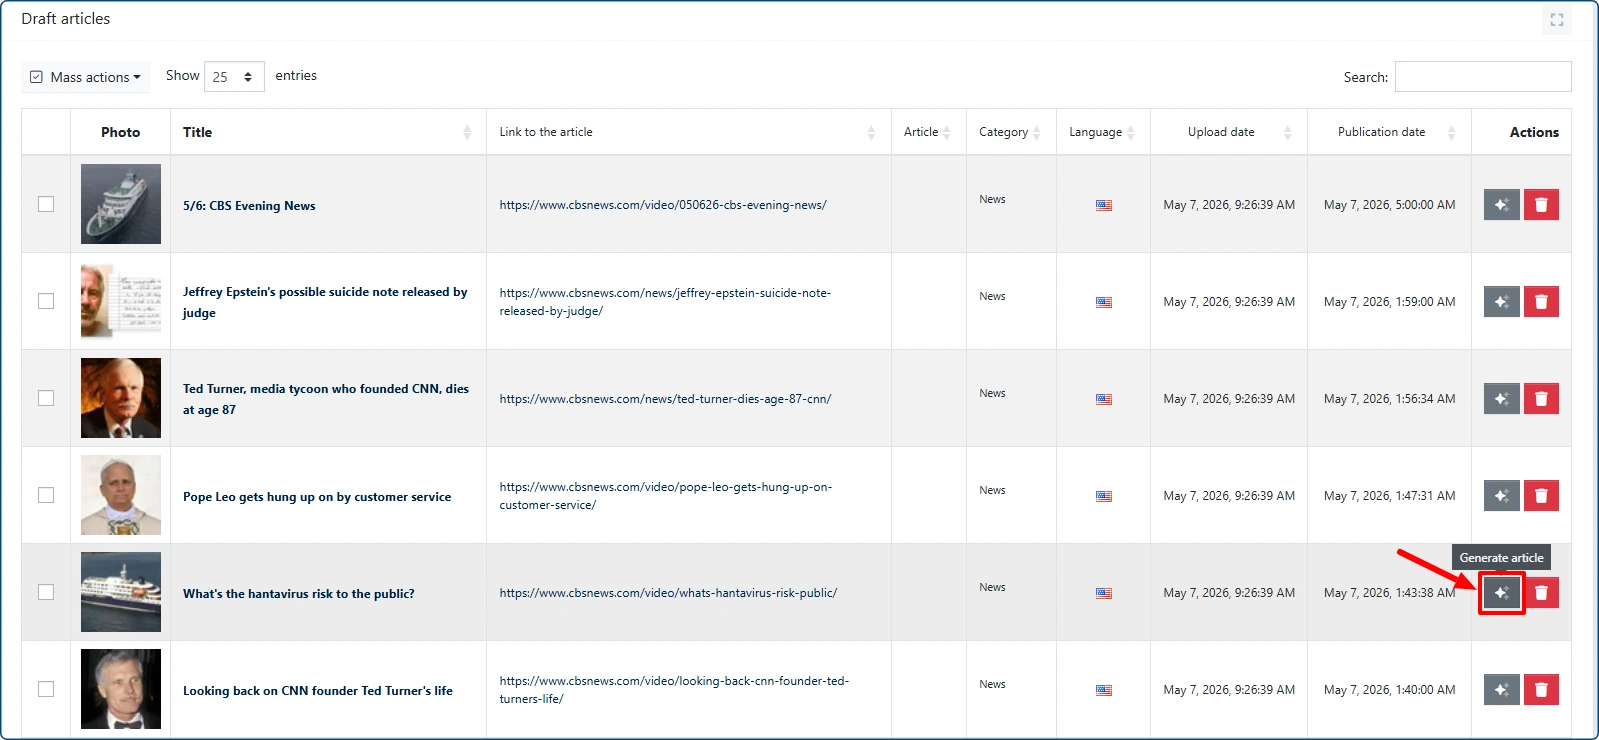
To generate a paraphrase of a selected post using the AI Assistant, click the gray "Generate article" button next to a draft.
You will be taken to a summary of the selected article. Click "Generate article" again to confirm.
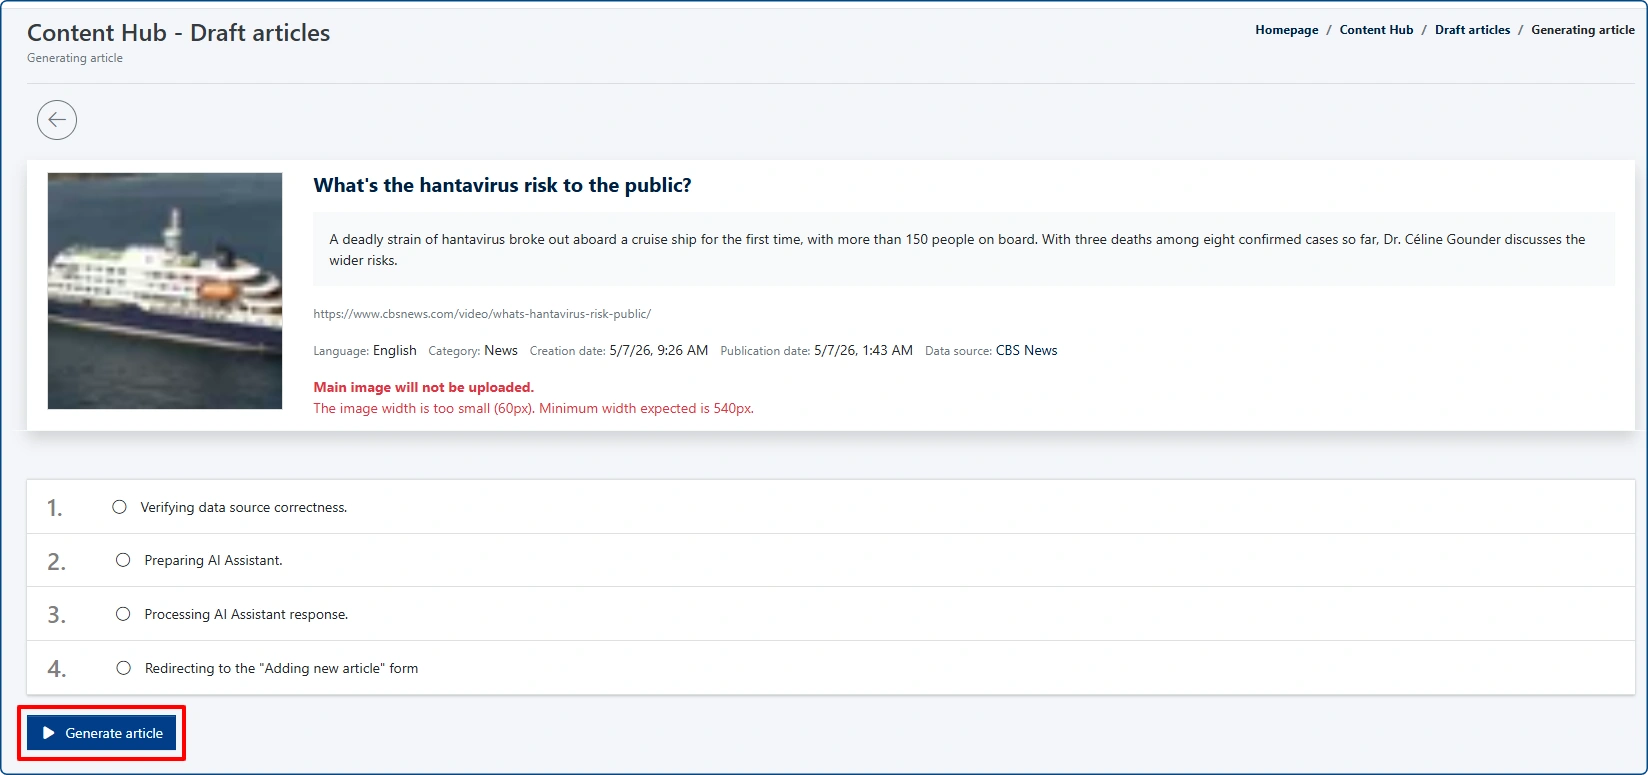
IMPORTANT: If the source image is smaller than 540x540px, it will not be uploaded as a main photo of generated article. In other cases, it is being added automatically.

The system will display the progress in 4 steps. Once complete, everything will light up in green, then you will be automatically redirected to the Article Edit view. This ensures you maintain full control over the content. A notification will remind you that you are editing a post generated from external content, and all original source details will be listed.
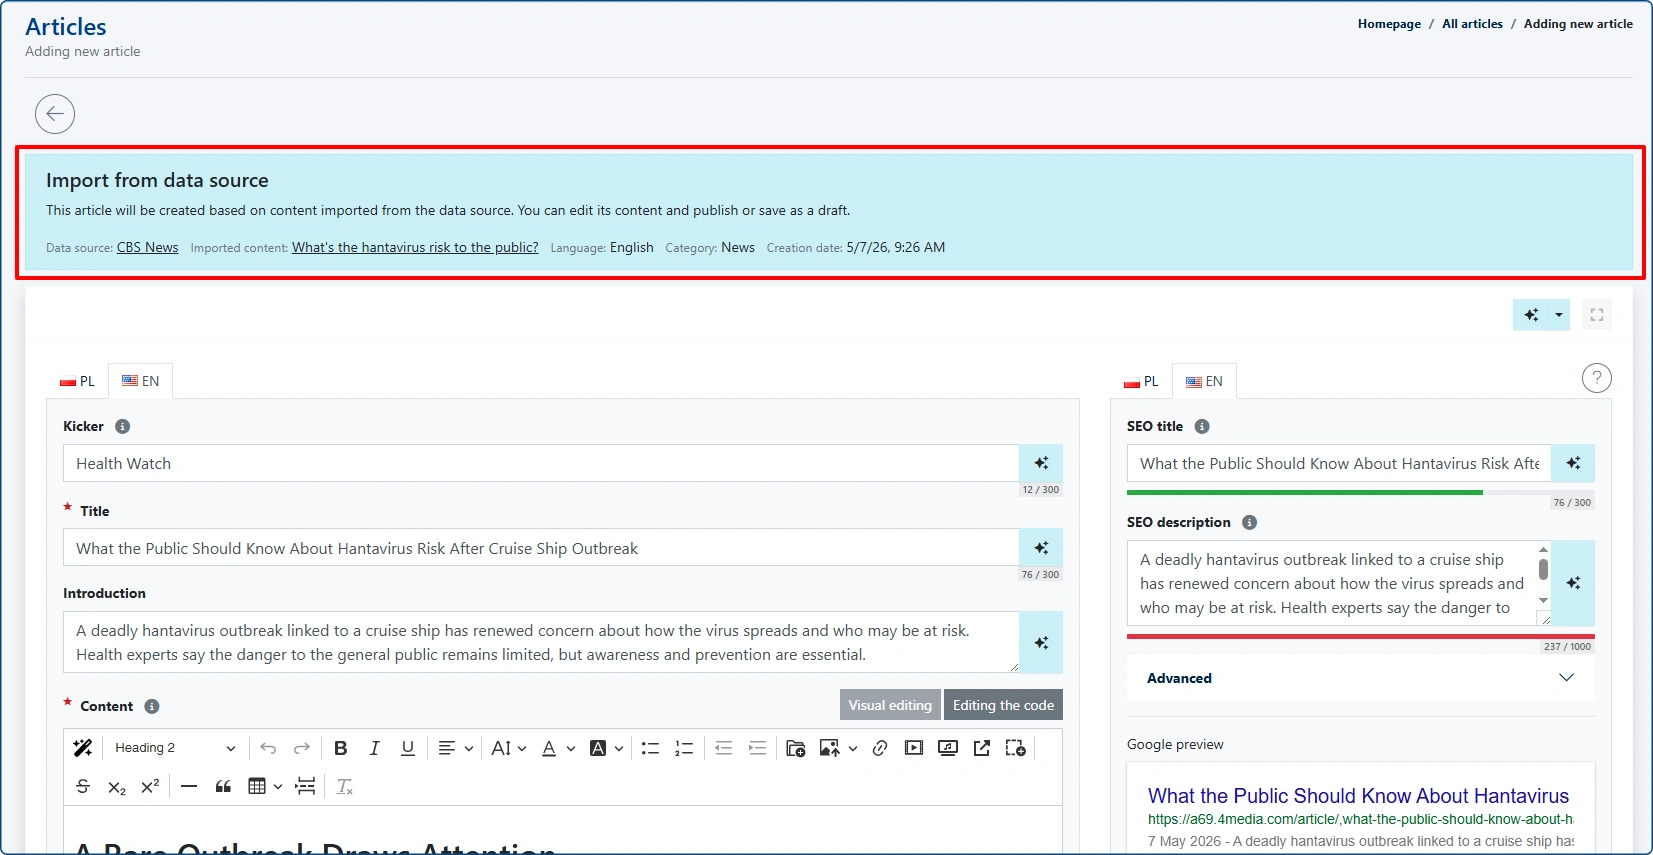
Note: A note regarding the original source, including a direct link, will always be placed at the end of every generated article.
You can publish the resulting article immediately, schedule it for later, or save it as a draft if you wish to finish editing it later.

Content Hub Dashboard
Once you have added multiple sources and performed the initial scans, the main dashboard will provide a comprehensive overview:
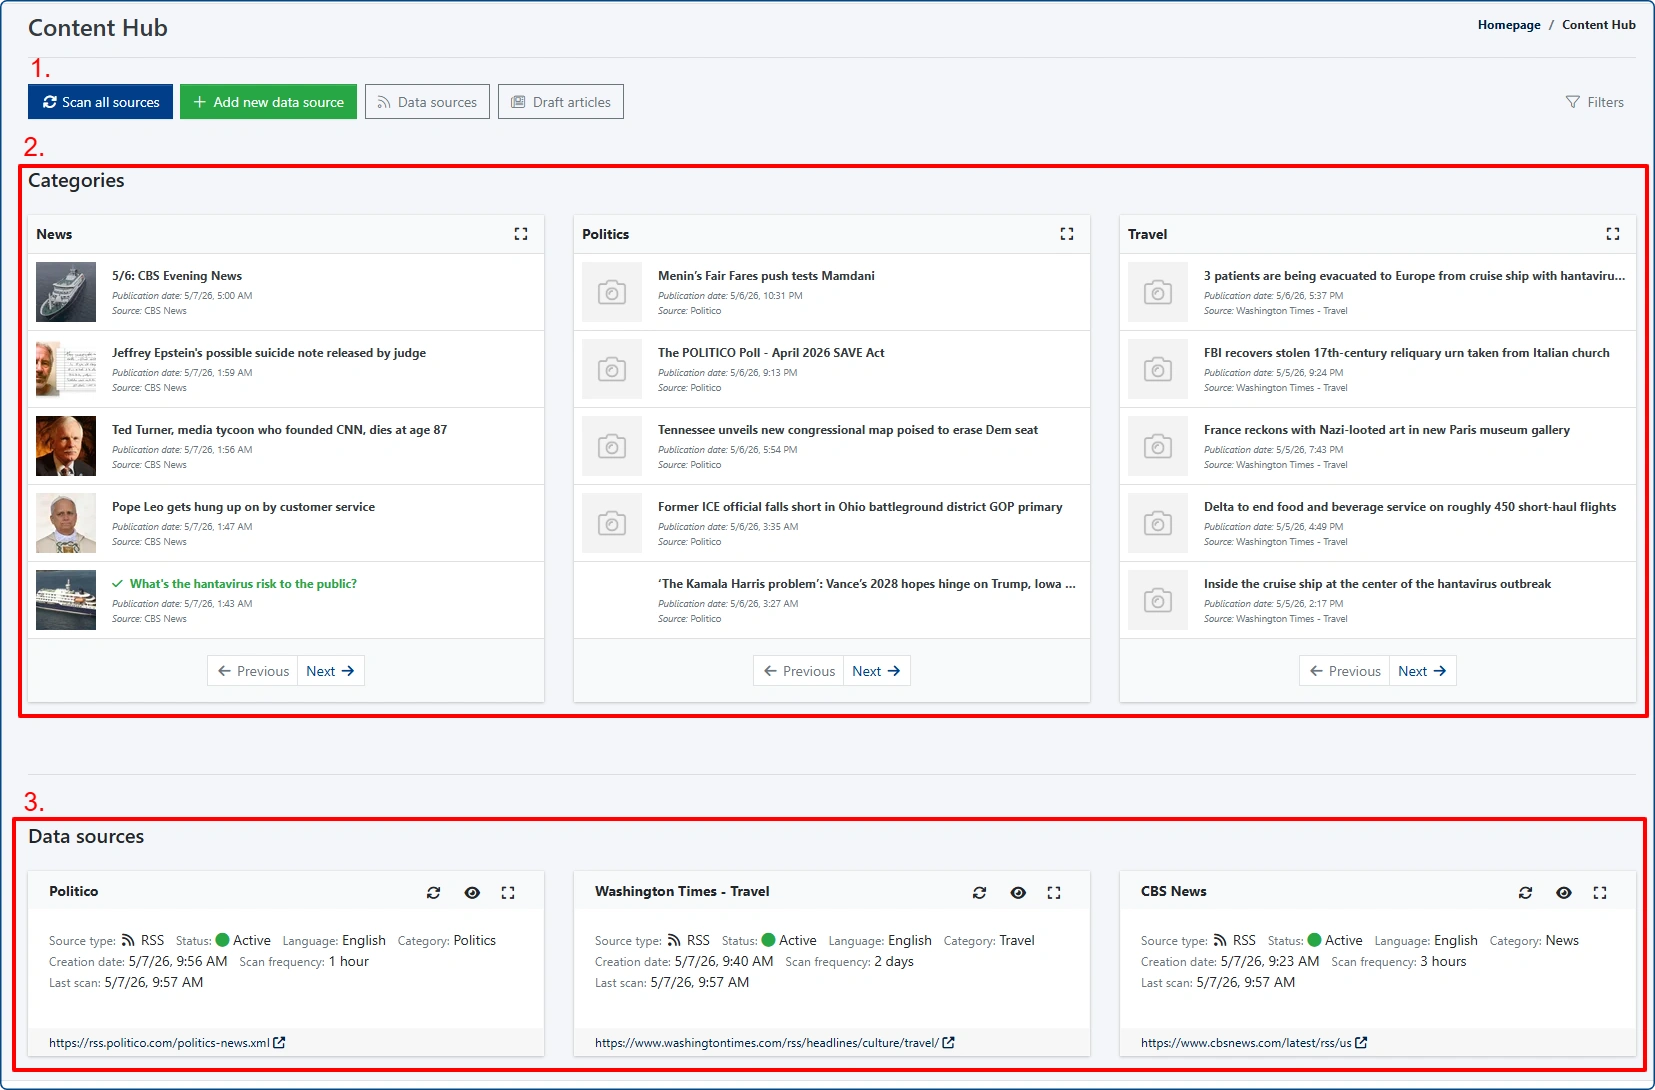
- "Scan all sources" – a global action that forces a manual scan of all added feeds simultaneously.
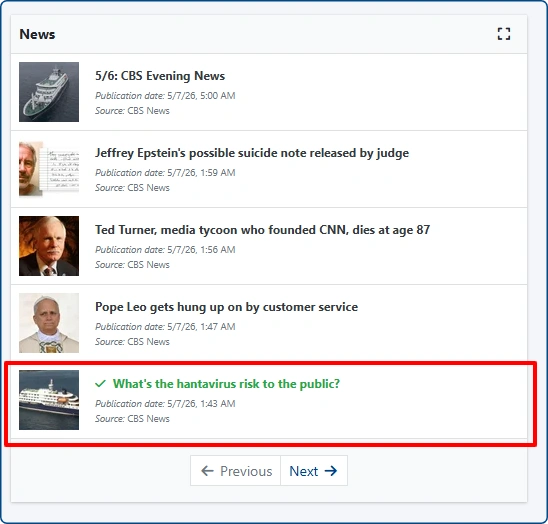
- [Categories] section – displays lists of scanned articles sorted by the thematic categories assigned during the setup phase.
- [Data sources] section – a quick preview of your active sources and their basic information.
Entries that have already been used to generate an article in your CMS are highlighted in green to help you avoid duplicates.

")

