
This module allows for the display of additional, thematically related articles below the article content. Related articles will appear between the main content of the article and the comments section (if commenting is active on the portal).
Activation
To activate the related articles section:
- Log in to the CMS admin panel.
- Navigate to Settings > Related articles (/tipadmin/settings/article-related).
- Choose from the two available options:
A. Related articles enabled - globally Selecting this option means the related articles section will appear under every published article.
B. Related articles enabled - Per node Selecting this option allows you to enable the section only for specific, selected articles.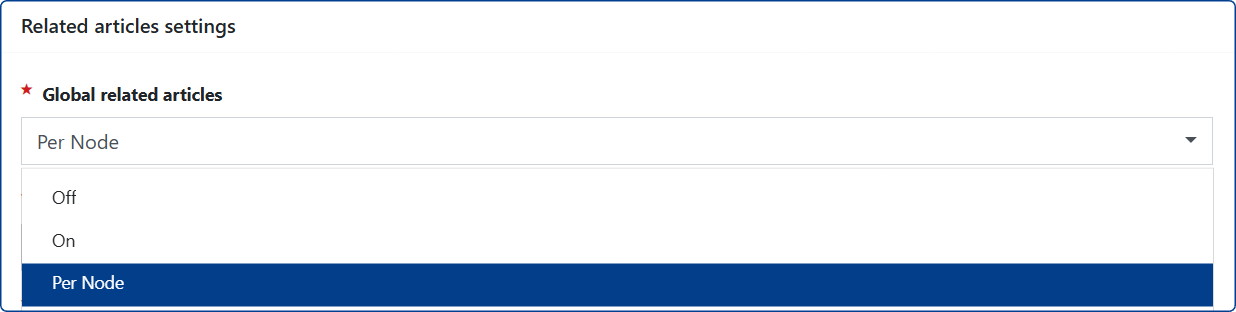
Note for Option B: When selected, buttons will appear in the article list under the [Mass Actions] tab, allowing you to activate/deactivate the extra section for related entries.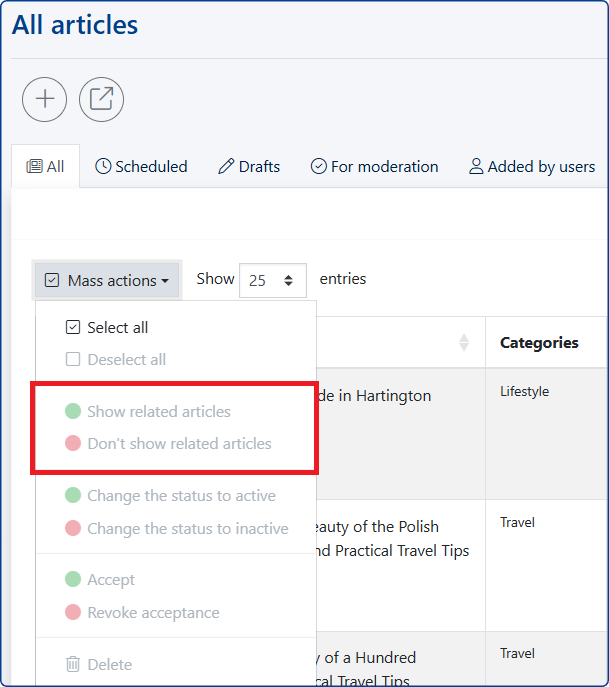
In this case, you decide which articles should display related entries. Once selected, the indicated articles will display a label confirming this status.
IMPORTANT! The label and options located in the [Mass Actions] tab will not be visible if you choose Variant A, because under that setting, the related entries section will be enabled by default for all published articles.
How to configure the related articles section?
In the Settings > Related articles tab, you define: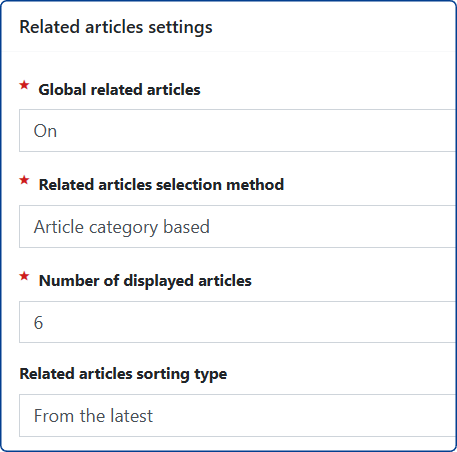
A. Method of selecting related articles Choose one of the two available options from the list:
- Based on the source article's category, OR
- Based on the source article's tags.
B. Number of displayed articles Enter how many related articles should be displayed under each article.
C. Sorting method for displayed entries Choose one of the two available options from the list:
- Latest, OR
- Most Viewed (When selecting [Most Viewed], you must also indicate the time range from the available list).

Visual Configuration
To specify exactly what additional information will be displayed, proceed through the following settings:
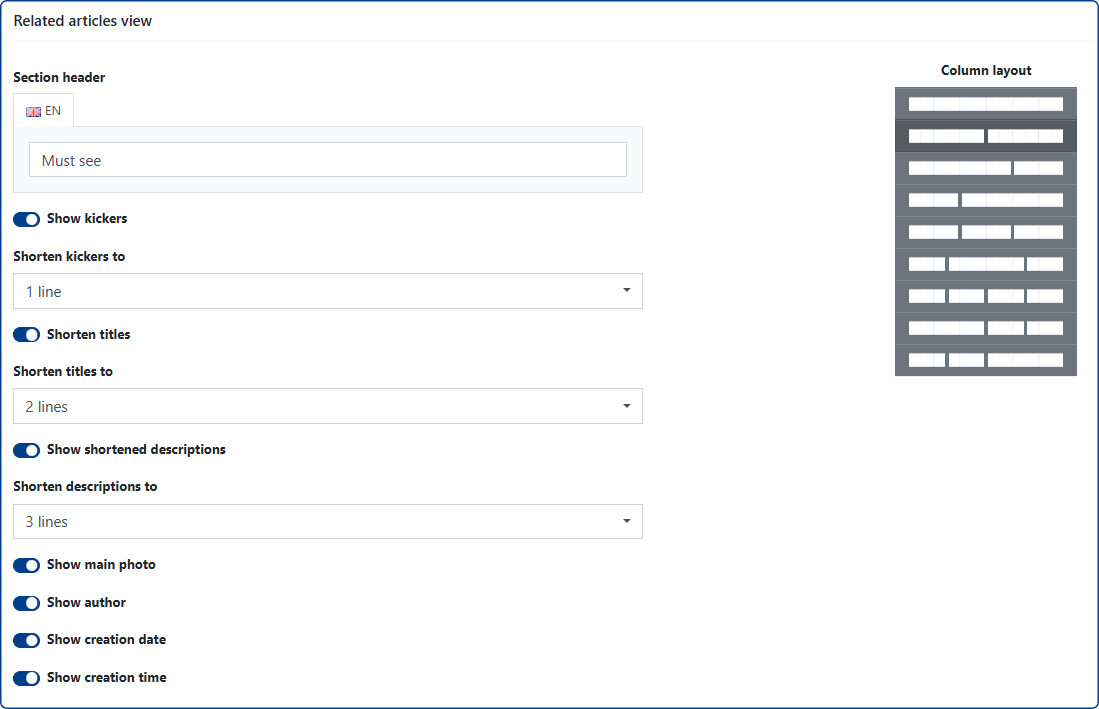
- Header: Enter a name for the section (this field can remain empty).
- Manage the length of the [title] field.
- Activate and manage the length of the [lead] field.
- Activate or hide the display of:
- Kicker
- Main photos for related articles
- Author information
- Publication date and time
- Select the tile layout for related articles.
Custom Styling: To implement additional changes - such as changing the color, weight, and font size for the title, lead, author, date, or kicker fields - you must prepare dedicated CSS styles and add them in the Settings > Custom CSS styles tab.

")

